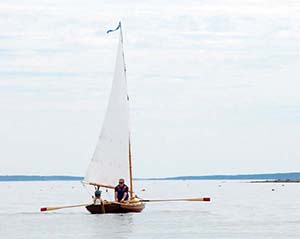
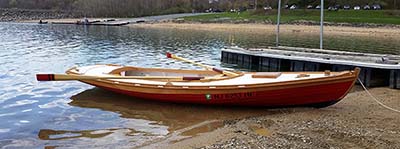
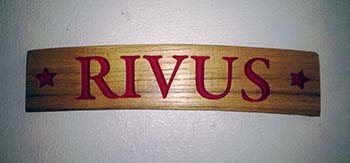
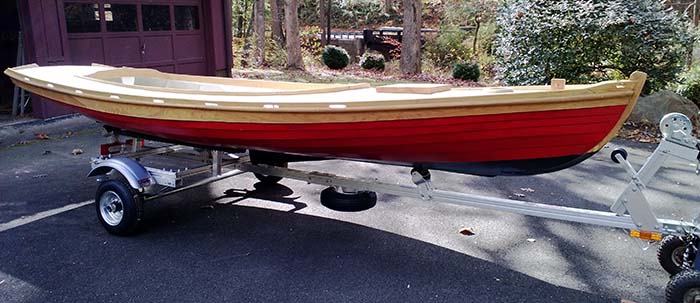
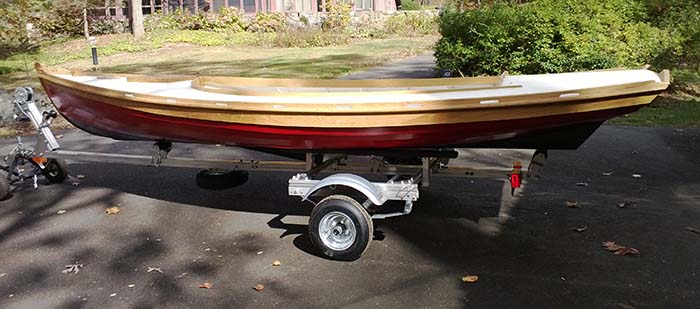
Rivus
rīvus Latin, a small stream, brook
 |
A modified Barto/Brady 16' Melonseed
Steve Brookman-Builder |
|
|
|
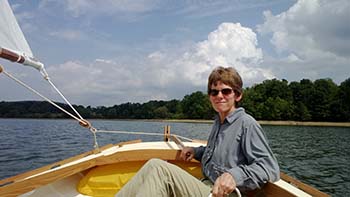
Photos: Andy Slavinskas |
After building Vika, the 19' Ohio Sharpie, I found that the boat building bug had bitten me hard. I wanted to tackle a classic looking glued lapstrake next and after doing some research I discovered a boat with local color and history, the Delaware River Tuckup. Before long I worked up a website promoting the design, built a model and even helped paint a real one at the Philadelphia Independence Seaport's Workshop on the Water. |
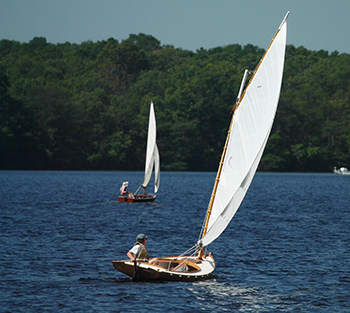
My wife and I got to sail a couple of tuckups at a Delaware River TSCA messabout. Even on a light air day we discovered that these boats were "sporty." On the way home my wife, being the practical one in the family, asked "who are you going to get to crew this boat after you build it?" Good question. I hate being practical but she was right. A boat that didn't require 2-4 extra bodies to keep her upright, and would be able to sail singlehanded would be nice, and practical.
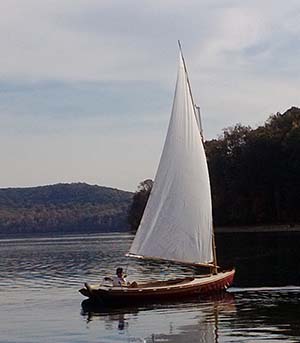
While at that messabout we saw Mike Wick's Pepita, a John Brady designed Melonseed. We were both wowed by her graceful lines, everything about her just looked right. Later that summer Mike invited me for a sail on a blustery day on the Delaware River and I was even more impressed with her handling. That day I bought the plans from John Brady and ordered the Barto 16' plans from WoodenBoat.
Off Center Harbor Video: A Good Boat Up Close, Melonseed Skiff (subscription required)
|
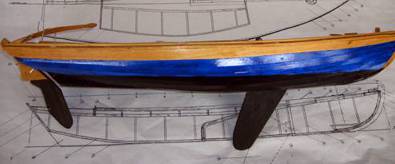
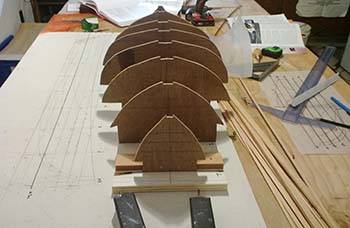
Winter project, build the model first
 |
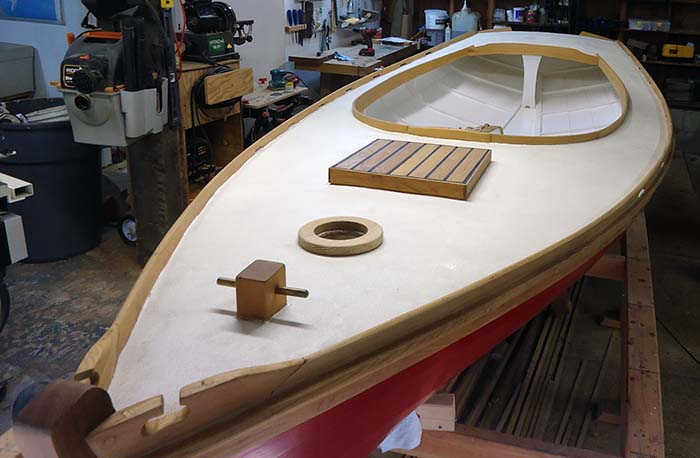
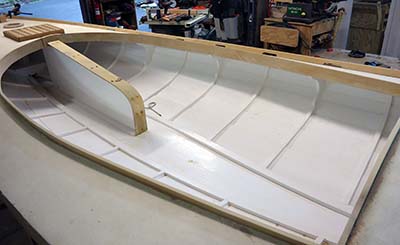
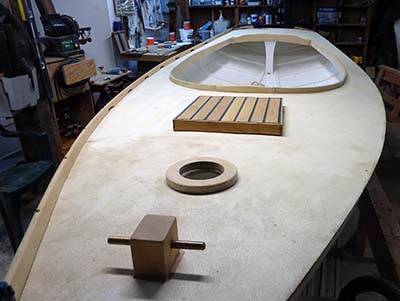
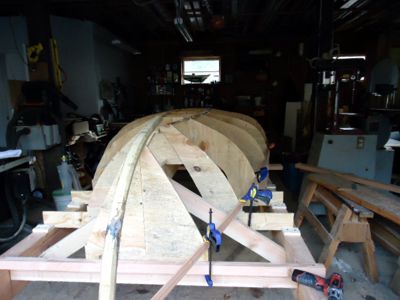
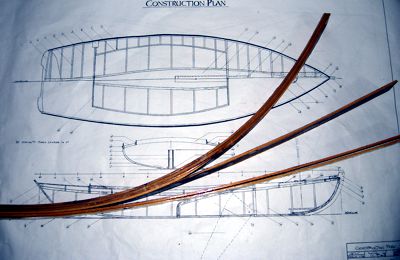
Building the 16' Barto/Brady Melonseed
|
|
|
|
|
| |
| |
| |
|
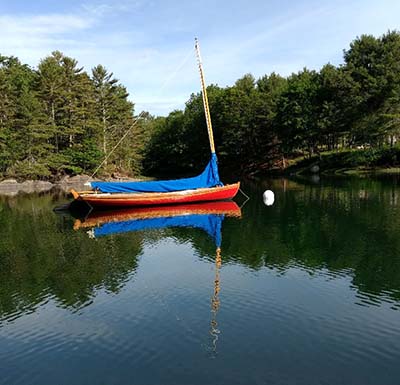
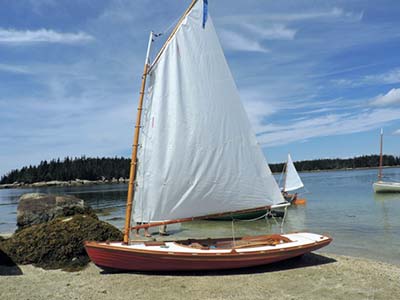
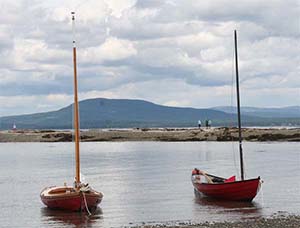
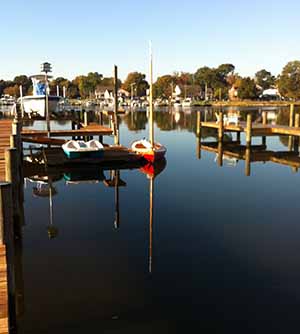
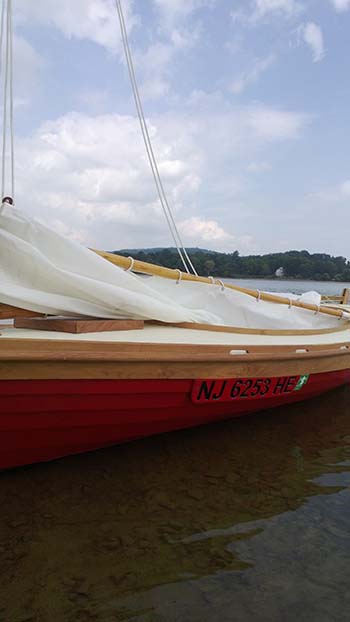
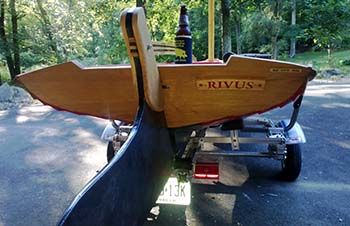
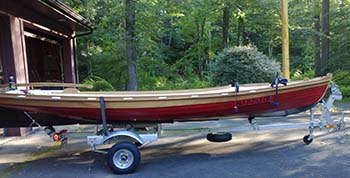
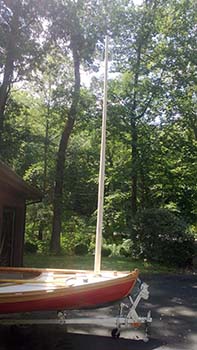
Rivus's new home for the summer
|
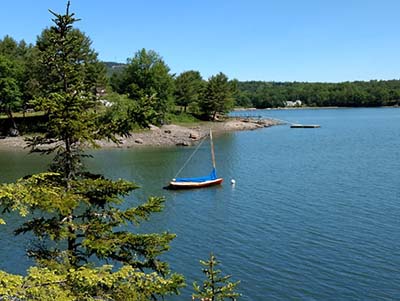
12' tides means spending some time high and dry |
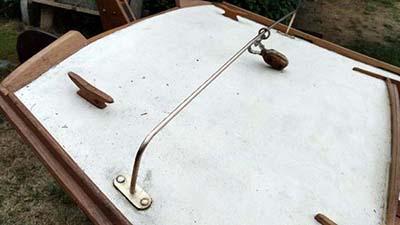
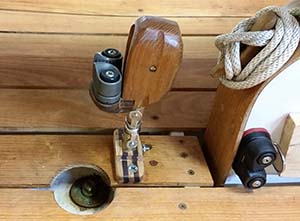
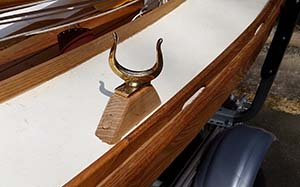
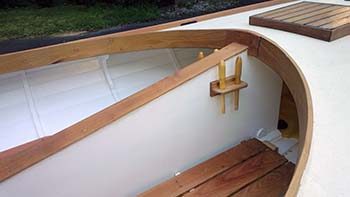
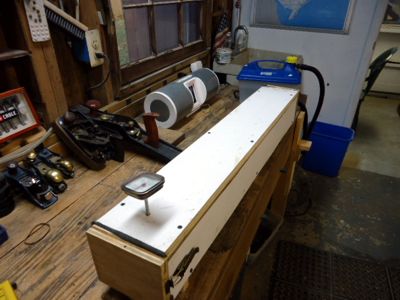
Took a metalworking class at WoodenBoat School during the summer of 2017 and with Erica Moody's
guidance made this bronze traveler. A good course and great instructor. I then had to carve a new tiller to fit under the traveler.
|
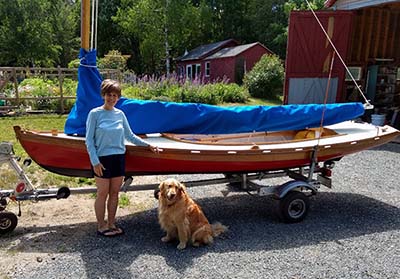
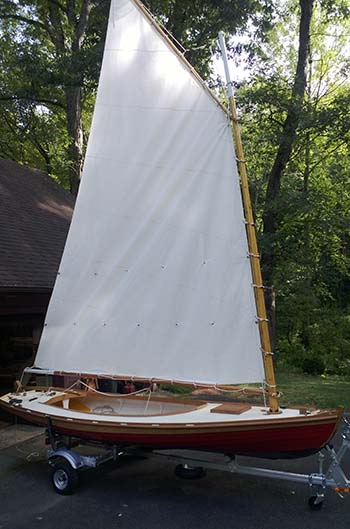
Susan made a Sailrite sail cover, Bagley supervised. Rivus will be living on a mooring this year.
|
Maine
We bought an old farmhouse on the north end of Blue Hill Bay in September 2015. While we can see the water the demands of remodeling a rundown 1900's house is keeping sailing to a minimum so far. That will hopefully change in the not too distant future. |
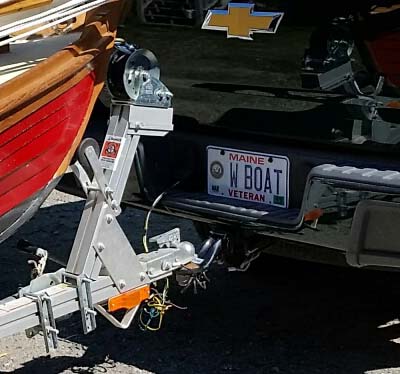
While I will always be "from away" at least I'm looking more like a Mainer.
|
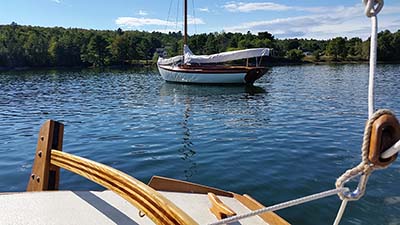
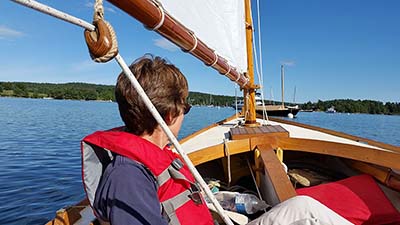
But when we do get to sail, it's usually special, so many beautiful boats to sail by...There are 2 12 1/2's moored near our house.
|
 |
Small Reach Regatta 2016 |
 |
 |
 |
 |
 |
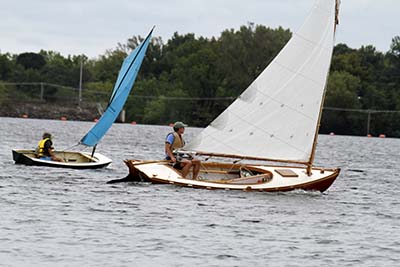
Delaware River TSCA Messabout 2015
Does it get any better?
|
 |
 |
 |
After an unintentional jibe I discovered it is possible to swamp a MS
|
Summer 2015 |
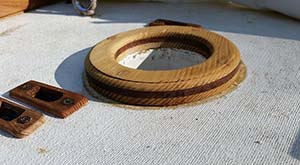
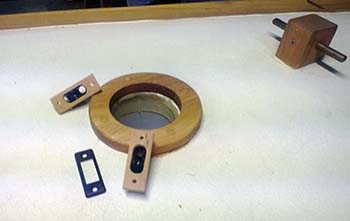
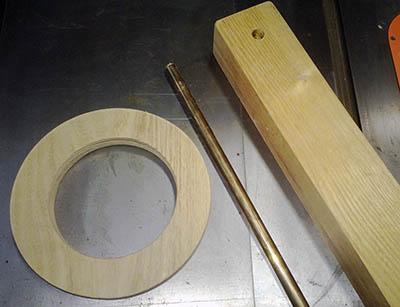
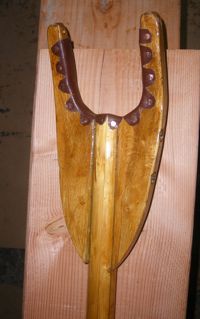
Remade the mast ring, laminated BL and black walnut. The solid BL kept splitting. Cut this with the CNC router. After a season of use needed to upgrade fasteners to thru bolts from #8 screws.
|
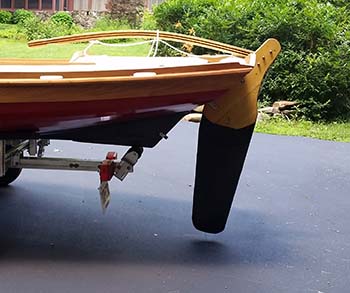
Kickup Rudder is the next project. Using the Gartside plans from Sjogin III built with Gudgeon Bros method. Went for a 32" blade and close to a NACA 1010 foil.

Ripped and laminated some old VG DF |

Lots of oops in this project, but I'd fill up this page if I put them all down.
|
Managed to get it finished and am very happy with it.
She tacks better and the heftier build just feels good.
|
Still messing with the rudder. The kick down while it felt fine it managed to stick. Sometimes even one moving part is too many. I might have made the groove for the pull down line too small.
|
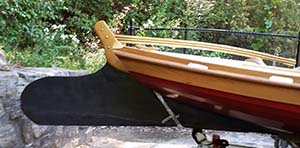
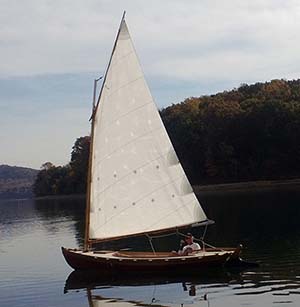
So I added a 3" wedge to the bottom of the original barn door to KISS and it does look more traditional. We raced last weekend in brisk conditions and it did good, so I'm not sure which will be my go to.
Update: 5 yrs later and the modified barndoor has worked fine.
|
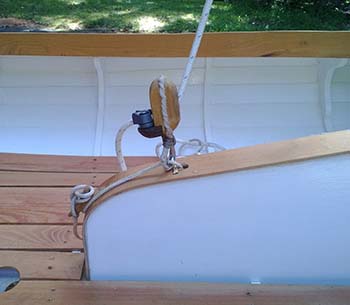
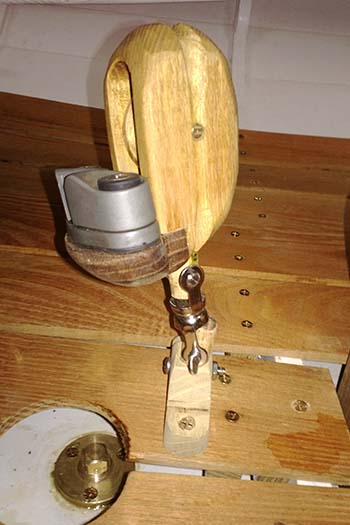
Mainsheet block mod 3. #2 was 1" solid BL, but it split. So this one has a laminated base (outcuts from tiller) and a spring so it stays upright. After one season of some hard use it worked fine.
|
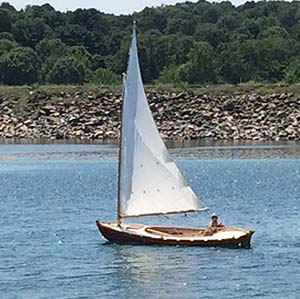
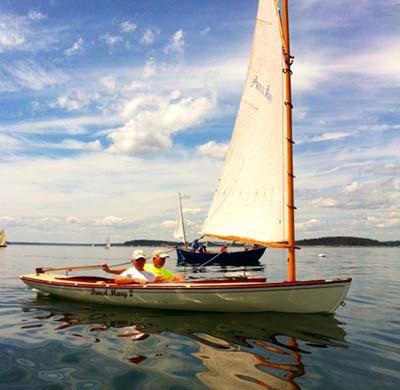
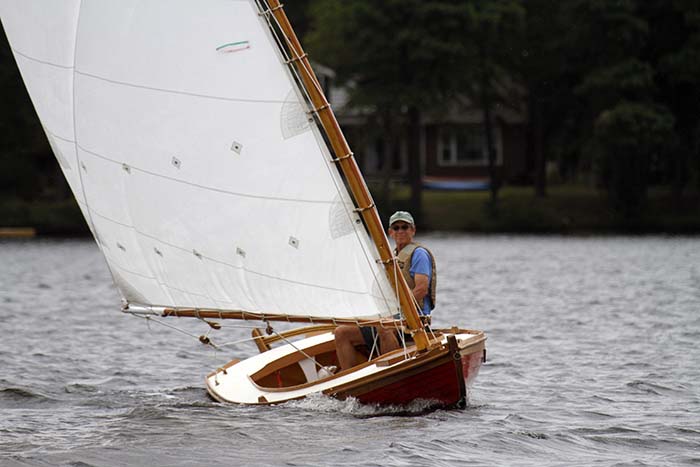
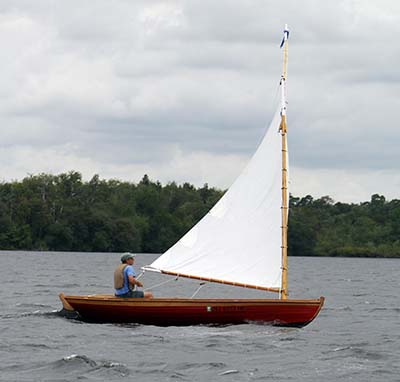
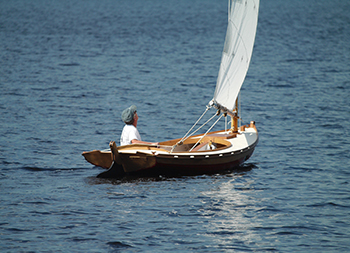
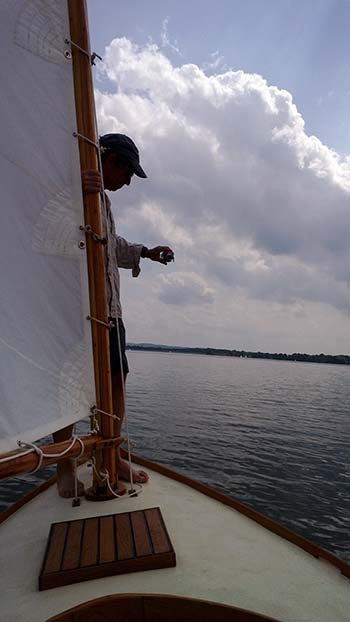
Caught daysaling on Round Valley by a boat admirer on a perfect July day. Had the reservoir to myself with only a few paddlers. Typical summer day: nice breeze, no breeze, calm, then rail down, calm...
|
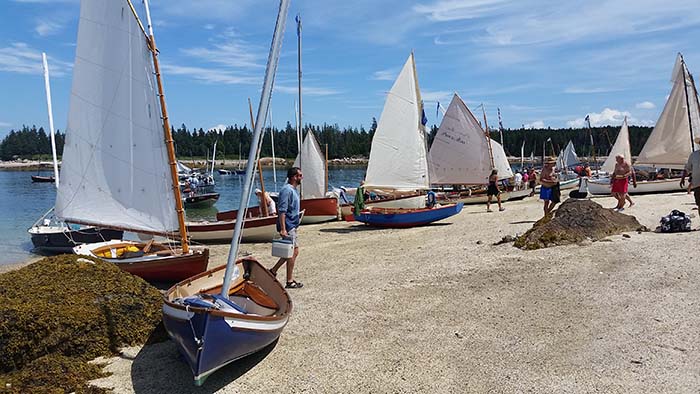
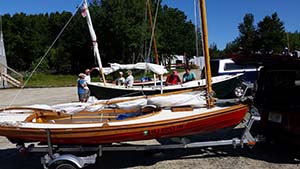
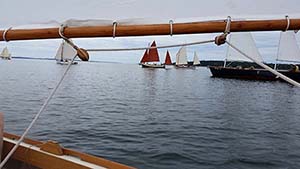
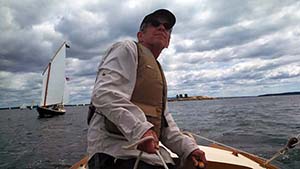
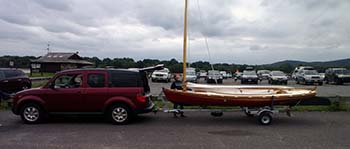
Small Reach Regatta
We trailered Rivus for about 10 hours to get to Brooklin, Maine and the SRR to join 48 other traditional small craft for 3 great days of sailing and camaraderie. The folks at WoodenBoat produced this Video of the event. Rivus makes an appearance at the very end. |
Each boat got a thorough safety inspection before being allowed to launch.
|
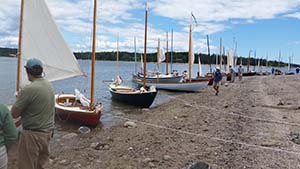
We sailed to a different island each day for a picnic lunch.
|
With exception of 1 hour of calm we had great sailing weather. Good reason to bring a younger brother along for crew!
|
That is Blue Hill in the background...where we will call home next year!
|
 |
 |
 |
| Winter/Spring 2015 |
Brutally cold winter so not much done in the unheated shop. 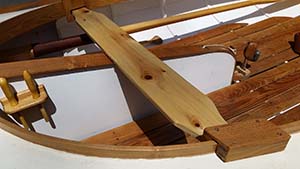
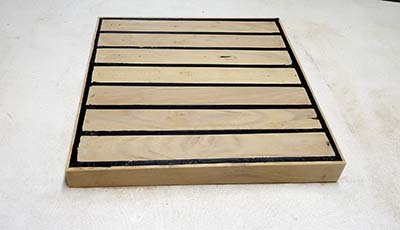
Managed to figure out a rowing station, cedar plank with BL blocks.
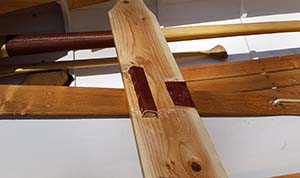
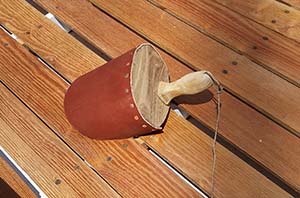
Some leather covered blocks for positioning and chafe.
|
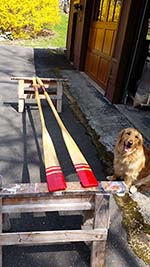
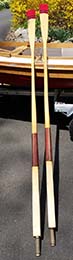
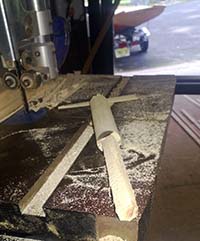
Made a couple of Culler style oars out of construction grade 9x2 spruce. The wood was green so who knows what they'll look like at the end of the season, but I need oars now. I will save, and dry, another 9x2 for future use if needed. |
 |
 |
 |
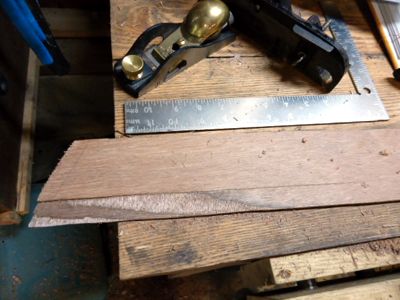
I abandoned my first attempt at using ash as the blade showed a nasty check. Maybe if the ends had been painted when purchased it wouldn't have checked. Also the 6/4 thickness was not ideal, 2" or 3/4" would have worked better. One other issue, a 10' oar does not store as well as a 10' stick! I ended up taking 3" off to get the oars to store better. |

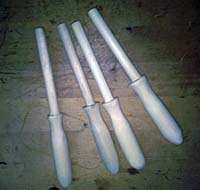
Handles wrapped with tarred twine. Tried shellac but then resorted to supergluing the ends when the twine came undone.
|
She rowed fine, possibly the 9'9" oars could have been made slightly shorter. Future rows will tell.
|
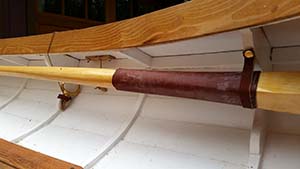
Used some leftover leather to make straps and snap the oars under the deck. A bit more to find a place for the oarlocks.
|
.  |
|
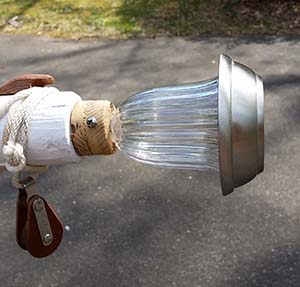
Solar masthead light ($3.50 special from Lowes) At that price I bought several for spares
|
| Fall 2014 |
Lazy late October sail on Round Valley
|
 |
Rented a house in Edgewater, MD for my 40th USNA Reunion. Sporty sail getting her here, 1st time w/double reef winds 15G23, she did fine.
|

Next day much calmer. Showing my Navy spirit on the cast I earned remaking the mast step. Good news, mast step worked fine.
|
| Summer 2014 |
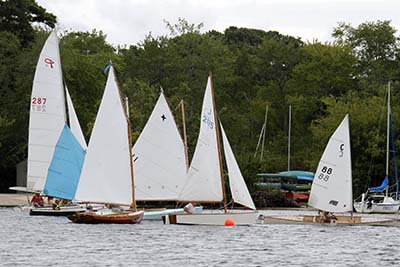
Delaware River TSCA messabout, Union Lake, NJ |
 |
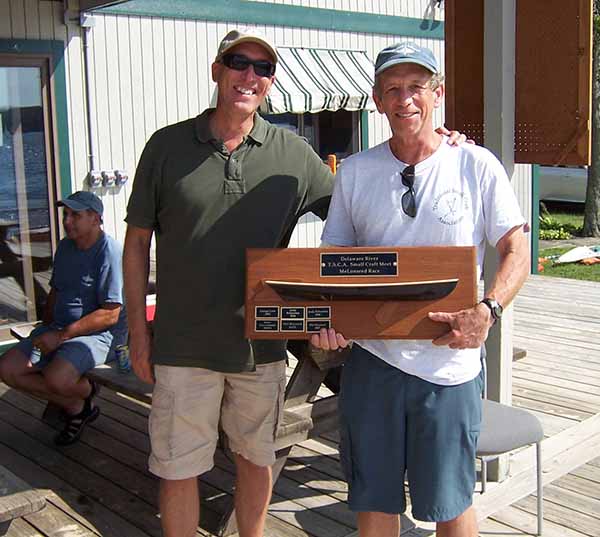
RIVUS wins the Delaware River TSCA trophy! Not bad for the 3rd time getting wet. (* she was the biggest seed with the biggest sail)
|
 |
Beer (IPA) christening
|

Happy Skipper
|
Happy Sailmaker
|
Launch day, finally
|
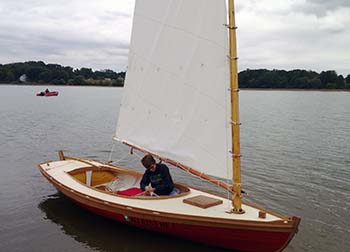
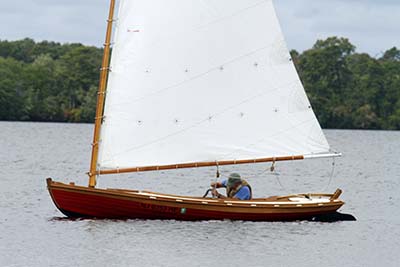
Floating and rigged
|
See how my mainsail sets....couldn't get that out of my head today
|
1st attempt at the mainsheet block. Nope, not going to work.
A solid dowel and a swivel fitting did the trick. This is still the Beta version will clean it up now that I know it works.
|
HIN is on, we must be getting close.
|
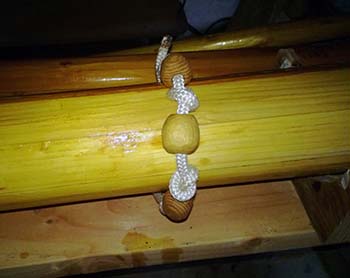
Going with robands for now, we'll see how it goes. Of course had to make the parrel beads. After making a bunch of these beads, I'm thinking a lathe might be a nice addition to the shop.
|
Pins installed. OK, more than a 10 minute project, but still pretty quick...and no lathe.
|
Damn govern'mnt revenooers, have to affix numbers on this brand new hull, and 3" numbers don't fit on 2" planks. . Mouse over to see why I didn't keep them bright, which was my original bright idea.
|
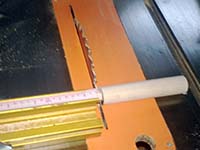 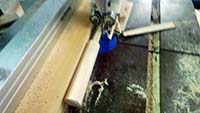
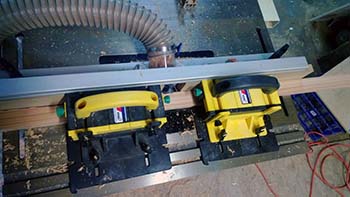
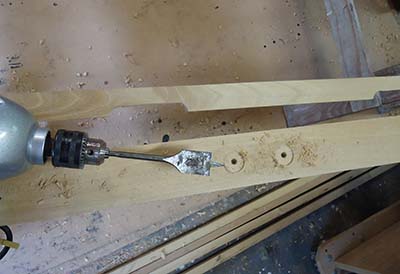
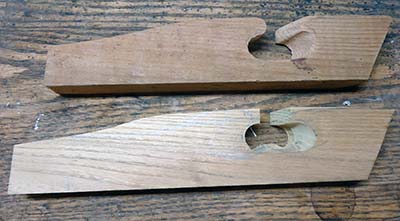
10 minute, lathe-less belaying pins. (Saw this on the WB Forum) Started with a hardwood dowel, cut a groove half way, then over to bandsaw. Set up a fence and a stop and shaved half of it.
|
From here I take it to a drum grinder then sander to shape the top.
|
I pound the bottom through a 1/2" die and voila, belaying pins! The 10 minutes doesn't include the sanding and varnishing.
|
| |
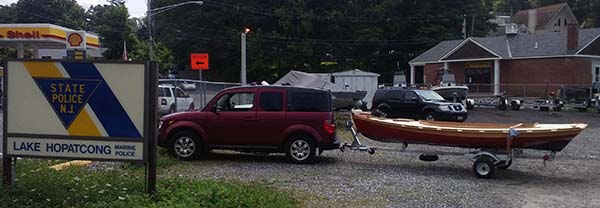
We got near a lake today, for an inspection. Next time we should be sailing. Drove up to Lake Hopatcong to get the NJSP to inspect the hull, ensuring that I didn't steal it. We passed!
|
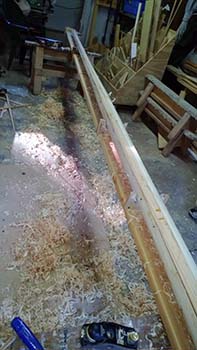
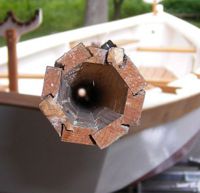
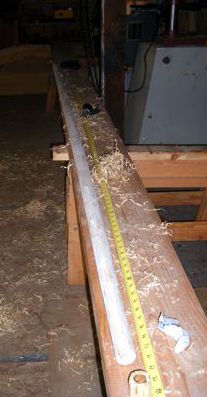
Mast building? More like kindling making. On this try selected 2 2x10x16 DF from a local lumber yard, trying to quickly access the quality while under the supervision of a yard helper. A year later, I rip, plane, birdsmouth and assemble only to back off before gluing as the knots seemed too iffy. So another lumber yard, this time 1x3 construction spruce, ripped, planed, BM. Bottom line I ended up using 2 DF and 6 spruce staves. One funky mast. But I did overbuild by 50% since it is unstayed.
|
Another case of dumb ass boatbuilder as I rushed the glue-up and it has a built in "rake." Not so noticeable if placed right.
The first coat of varnish very slow to set, must remember to use a dryer. Subsequent coats dried nicely.
For reference: N=8, OD=3.75, ID=2.5 H=.72 L=1.46 K=.49126
|
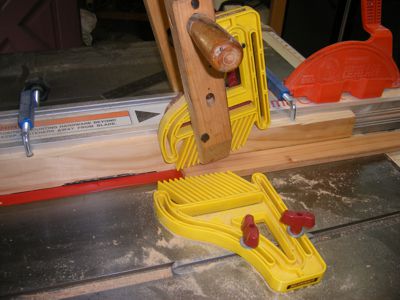
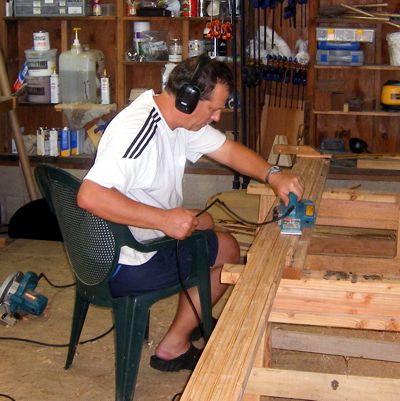
These grippers make handling 16' staves in a one man shop easy.
|
Finally got to use the CNC machine for the boat!
|
| Spring 2014 |
Still not sailing, but I do like opening the shop and seeing this.
|
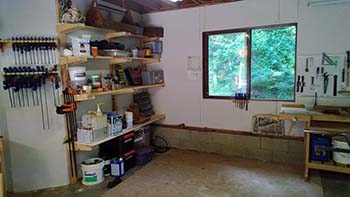
My family vised in June and it rained their entire stay. So instead of sailing Vika as planned I recruited my 2 brothers and we installed these windows that were salvaged from a remodel.
|
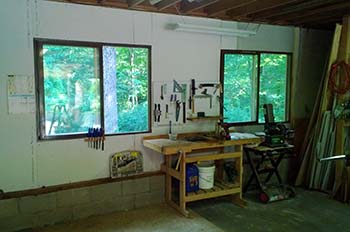
With this much light and ventilation my wife might not never see me back at the house.
|
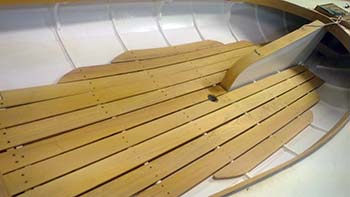
Floor boards out of black locust were a bit of a challenge without a jointer.
|
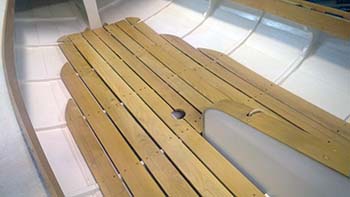
The center sections are removable.
|
The halyards will be run under deck. I made BL covers, now I have to figure out how to rig the boat.
|
Remaking the tiller, I didn't like the first one which was sawn ash, so this one is laminated ash and black walnut. |
Tiller done, 4" longer than plan. Now to finish the rudder. |
Rudder done! We'll see about adding the "Lucas Crescent" after we get to see how it works as drawn.
|

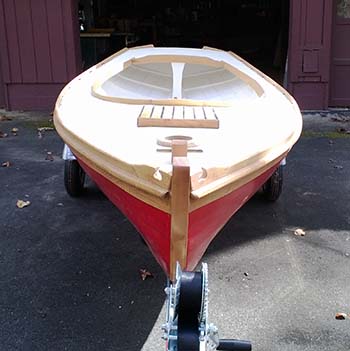
Bronze bow ring
|
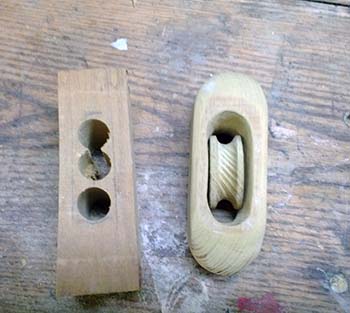
Wooden blocks in progress, ala Tom Jackson WB issue #.... Black Locust, hoping its hard enough, and doing some brushing up on marlinespike work. .
|
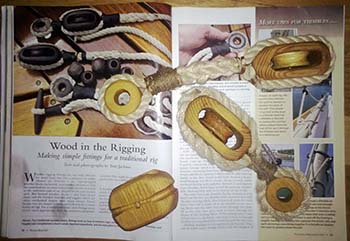
A fun project. I do the rope work at night as "homework." It will be interesting to see how functional/durable they are.
|
Rivus ready for her first ride
|
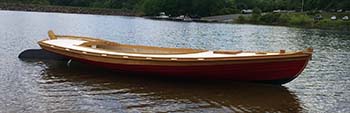
Splash! Good news is she floats, bad news, some weeping by the CB, Damn!
|
| Winter 2013-14 |

Since this has been a winter
only a golden retriever can truly appreciate...
|
I've retreated into my basement and begun a model of Sjogin III, a likely candidate for a next build...that is if I ever get Rivus done.
|
| Fall 2013 |
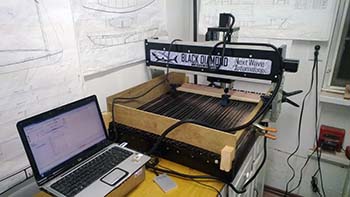
Had to take a break from boat building...bought a CNC router to help make awards for a trail race I direct in January. The real reason I bought it is that I should be able to make some nifty name plates and parts for boats.
|
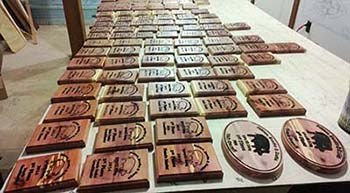
After I get 110 or so of these done, it's back to the boats! The awards are lying on the lofting of Sjogin, which reminds me I have another project still to do.
|
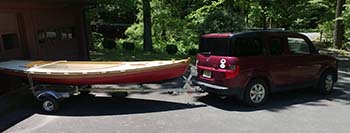
She's out of the shop for the 1st time! Wish I had time for a float/leak test.
Bought and assembled a Trailex SUT-500-S, dragged Rivus off her strongback and into the light of day. She is one low riding boat.
|
 |
 |
| Summer 2013 |
It's hard to stop but I think this is about it for this year as there are a lot of other non boat building distractions coming this fall and winter. Bummer. The hull is just about done, still needs floor boards, rudder, tiller and the rigging. Maybe late winter, early spring projects. I really look forward to getting her in the water next year.
|
Took a couple of tries to get the BL bent around CB Case
|

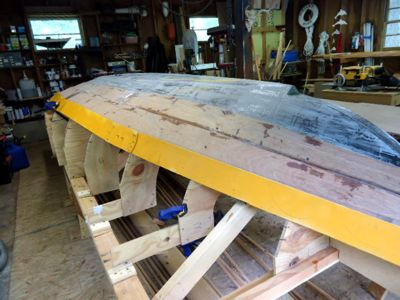
Toerails and rubrails installed, a whole lot of bunging and sanding coming up. Everything is being fastened with #8 SB screws and tan Sikaflex. The chocks got a few #12 SS screws in addition.
|
Starboard toerail on, starting to look substantial now. Always have to beware when you're making great progress, because....
|
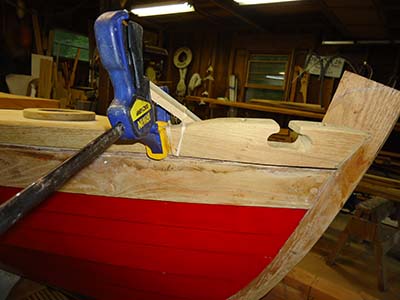
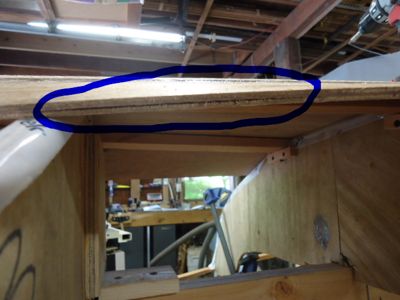
When I got to bow the glued scarf failed! Here I am trying another weak attempt to get it right, but it failed also. I ended fastening and epoxying it in place, came out close.
|
I had just enough Black Locust left to get out the toe and rub rails, with nothing to spare. Should have/could have tracked some more down, but didn't. Here the toe rails are being got out.
|
My scarfs are getting better, although they still fail on rare occasions. And that is more that enough.
|
Sue's 90 y/o Dad, who's quite an accomplished woodworker, got recruited to help build this hatch out of black locust. Not called for in the plans but seemed like a good addition. It awaits final sanding and oiling.
|
Parts starting to come together. Here the coaming is screwed in place, the hatch, mast ring and bit will be become permanent soon. Toe and rub rail next, and the CB case cover. But I'll have to rebuild the steam box before that can happen.
|
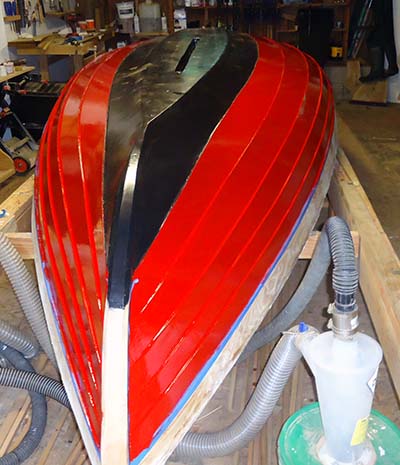
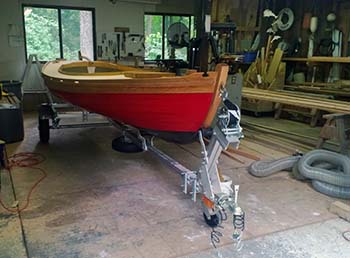
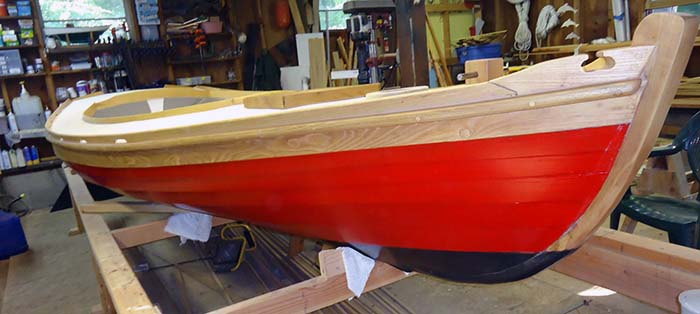
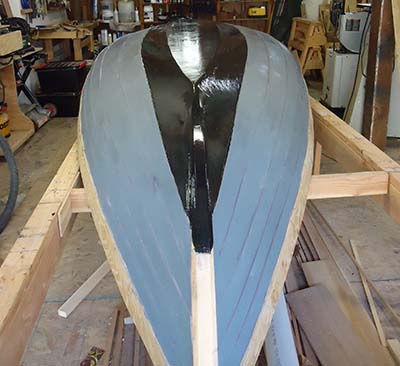
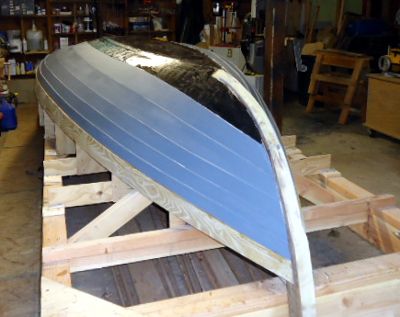
I've never had a red boat before, now I will. 3 coats of Interlux Brightside, one more to take the gloss down. Funky paint scheme as I'm only leaving the garboards and keel black (epoxy/graphite) and not painting a real bottom with waterline.
|

I saw this at the WBS this year, while I was hunting for a bronze version, and thought...why not?
Why not carve one out of black locust? The top is a cedar prototype, the bottom is my first go at a BL chock. We'll see how it goes when she gets flipped over again. Maybe use a butt scarf to the toe rail.
|
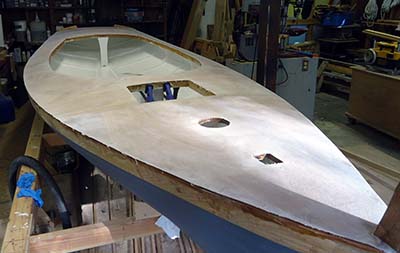
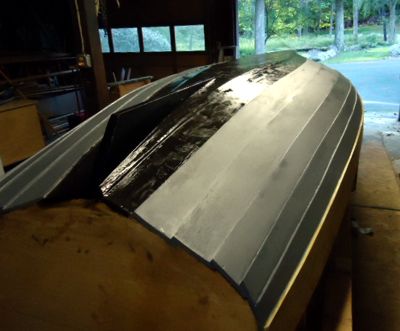
Deck covered with Xynole-polyester cloth, flush trimmed w/router, one undercoat and 2 overcoats of epoxy.
|
Painted the deck, but decided to flip her over and finish the hull before adding the coaming, toe rails, etc. Routed the CB slot for FG tape. Had to make that vacuum attachment to get the sawdust out the CB case.
|
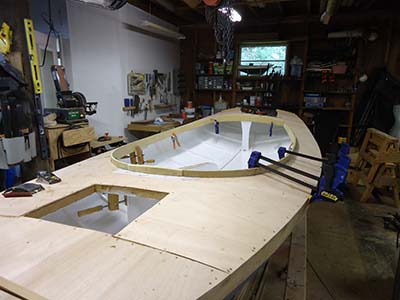
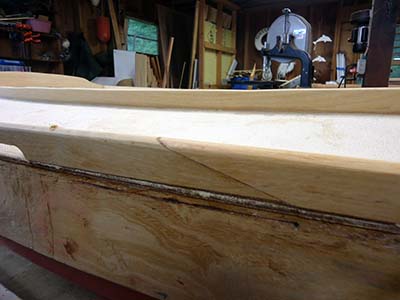
Black Locust coaming clamped in place. I made templates from door skin and got the BL from wood left from the sheer strake flitch. After resawing and planing it got down to 3/8", I was hoping for 1/2". But it was easier to steam and should work. Also since I opted for a lower coaming, to make it easier on the butt when hiking, I won't be able to use 1/4 round trim. Now I'll have to get a good fit.
|

I butt blocked the bow because I didn't have a big enough steam box to do it the traditional way. After visiting the Wooden Boat Show this weekend I saw the beetle cats and even Capt Nat did it this way on the BB15.
|
| |
| Spring 2013 |
Black Locust bit and mast ring, w/bronze rod.
|

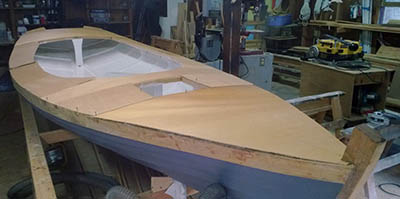
Last day of spring: Interior painted and deck on. It needs trimming then covered w/cloth and epoxy. There is a black locust coaming that needs to be fit, and that will be a challenge.
|

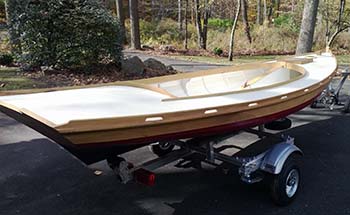
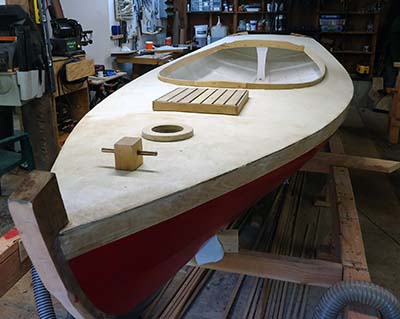
Sitting in the cockpit, I can now envision her on the water! Still a long way, but she's getting there. Also sitting in the real thing, I don't think I'll opt for seating. Cushions should be OK and a thwart, most likely removable, for rowing.
|
Door skin templates give a feel for what she'll be looking like someday.
|

45 minutes of steaming and I got the 1/2" cedar carlins in place. (another change from Barto) They are beveled to 10 degrees, and seem happy. Minor crimp in the tight bend forward, but the curve looks fair. Only a few side deck beams to go, a few more knees, another coat or 2 of prime paint, then it will be onto the next stage....
|
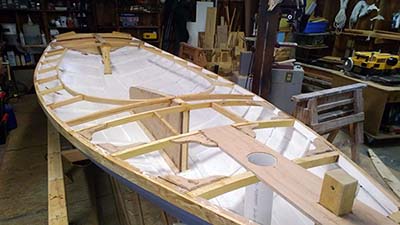
Now I'm getting the feel for the cockpit. Nice size, need to start thinking about the seating. Even though I don't see any hanging knees in Barto's plans, I'll add some.
|
Flipped hull again, plugged up screws and re-primed and epoxied
|

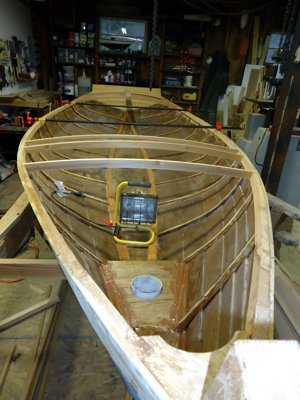
Lots going on here. With the boat back upright I coated the interior with some 2 part epoxy I had laying around, installed the CB, fore and aft king planks, deck beams and lots of knees since I'm going with a larger rig than Barto planned. I'm also using larger scantlings, 1+" sawn black locust beams for partners. Got the mast sleeve aligned (a 4" PVC pipe), and a black locust bit set in place. Here I'm working on a jig to get the curved cockpit coaming. |
.
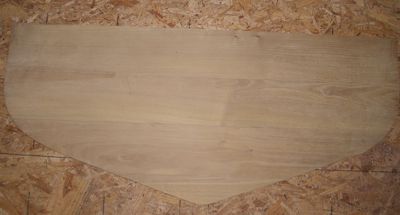
Transom rough cut |
CB fitted in case, 3 coats of epoxy/graphite
|
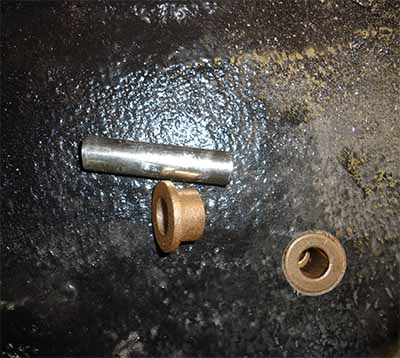
Bronze bushings and a SS pin cut from a bolt
|
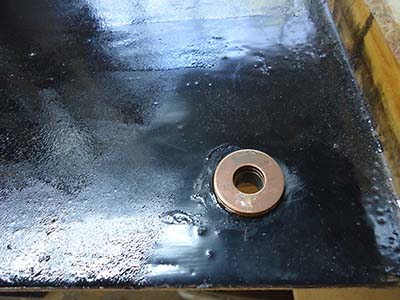
Added a couple of bronze washers for centering
|
Winter 2012-2013 |
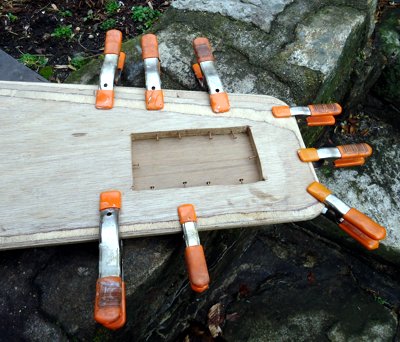
Using some basic math I came up with about 8.5# of lead needed. I hope that works in reality. A few ring nails added to help secure the lead. Sacrificial 1/4" ply on the back.
|
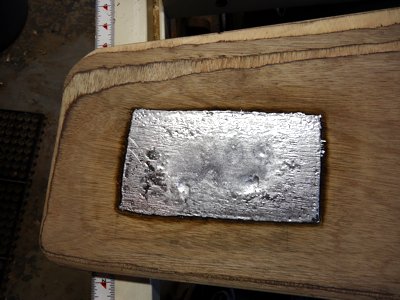
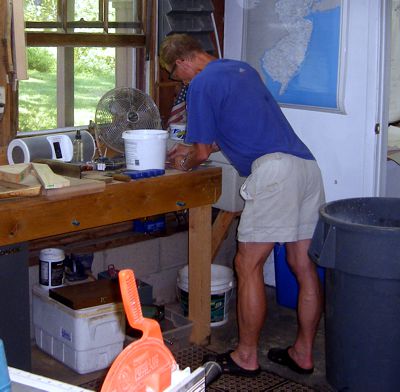
My first lead melting and it was uneventful, actually pretty easy. I was surprised at the slight amount of charring.
|
A few laminated deck beams (cedar), mast step (will have a 4" PVC sleeve)
|

CB, roughly faired. Lead next, then sealed with cloth and epoxy.
|
Fall 2012 |
Built my first steam box and used the steaming system I got from Rockler on sale. It was inexpensive and saved a trip or two to the store to look for parts.
|
Flipped, framed and epoxied. Steaming of the Black Locust frames went pretty well with only minimal breakage, about 20 minutes in the box made them very pliable.
|
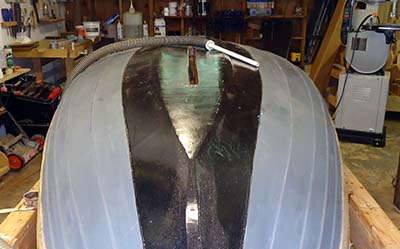
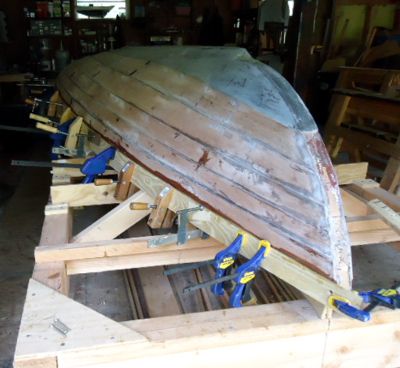
Planks primed, garboard epoxied w/graphite. Sort of a funky paint scheme, but might keep it. Next to flip the boat and see what kind of mess awaits. |
 |
| |
|
 |
While she might look glowing in her CPES, make no mistake, she is an epoxy boat. It will take a lot of it to make her even close to presentable.
|
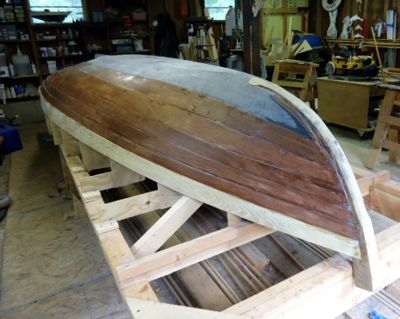
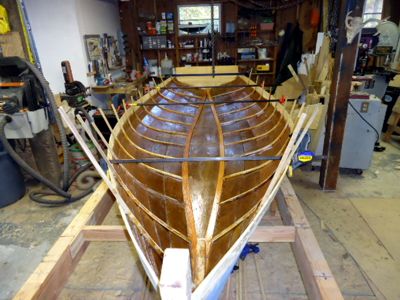
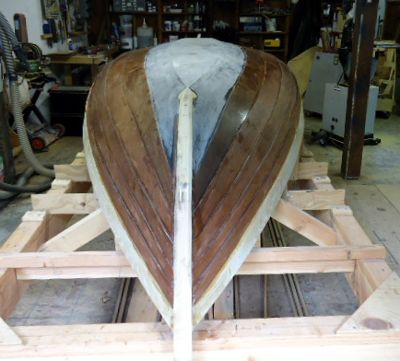
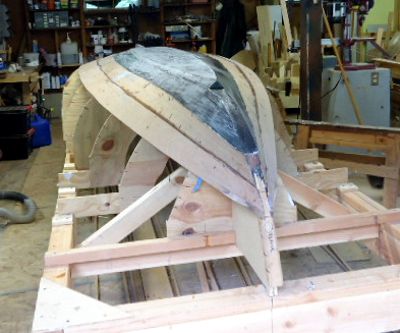
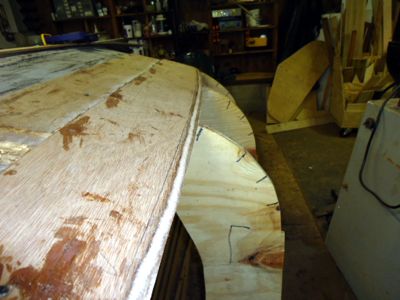
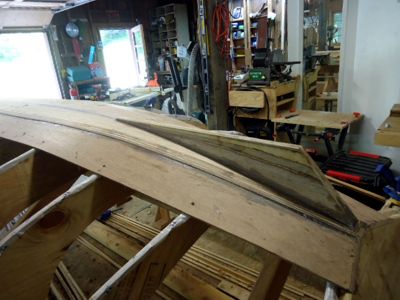
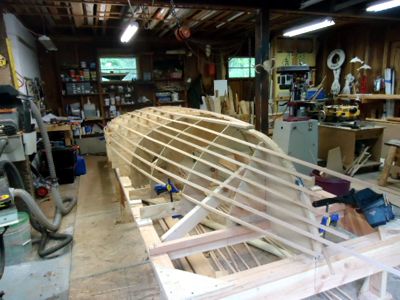
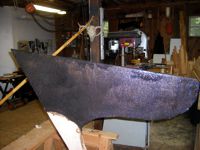
Planked, outer stem on, and sealed w/CPES. A lot of firsts for me here. While I'm happy getting this far, not sure what she'll look like it the light of day.
|
 |
It was a bit of work resawing and planing the BL to 5/16" and nib scarfing a 4+' piece, but it came out OK, and it fits!
|
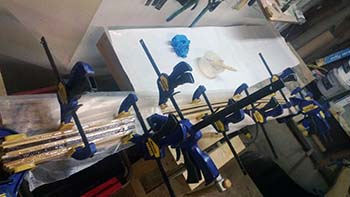
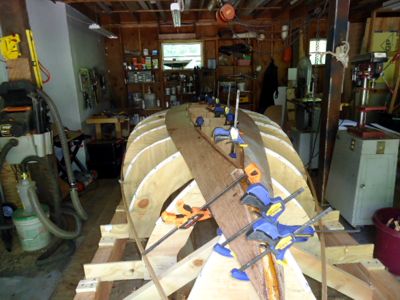
Calling all clamps!
|
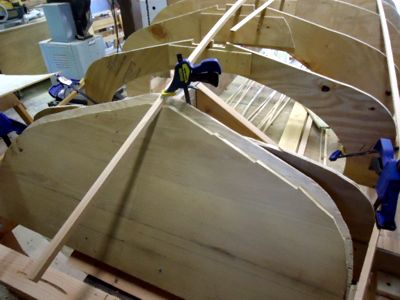
Dry fitted 2nd plank. Of course in keeping with how this project is going one of the planks had some delamination. So before attaching it I cut out a new piece...which also had some delamination...third piece appears ok. I think it was just one bad sheet of ply that since I ripped it in two and scarfed to make to 2 long sheets showed up in several places and that I'm now done with the bad stuff. The supplier did send a replacement sheet and gave a discount on shipping the additional sheets. Now I'm waiting for a cool day to cloth and epoxy the bottom and garboards.
|
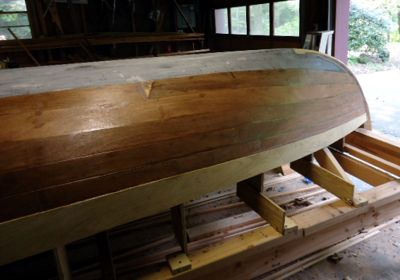
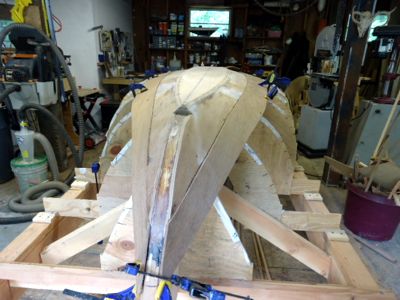
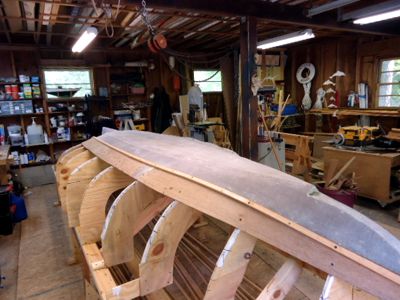
 5th plank on, 2 to go! You really see the hull shape now, she's a big saucer. 5th plank on, 2 to go! You really see the hull shape now, she's a big saucer.
|
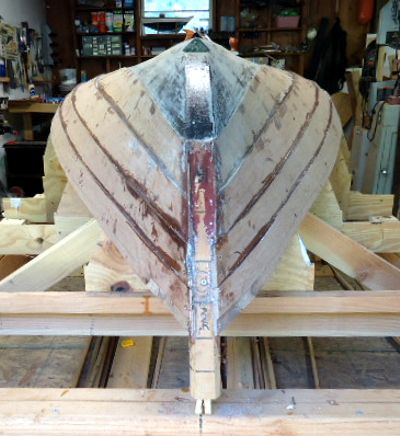
3rd plank on, scarfed in place. Garboard epoxied w/graphite, rough sanded.
|
Spiling for plank #4, which will be over half way! One issue, I can't see how to stagger the scarfs as the boat is 16' and the ply is 8', so that is how it will be. .
|

After a couple of planks I realized there was too much waste cutting them out of 2' sections so I cut the planks out individually
|

And scarfed them in place on the hull
|

This marking guide made quick work of marking the laps.
|
|
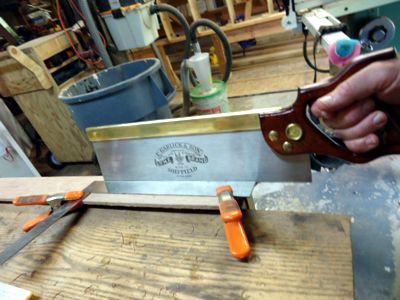
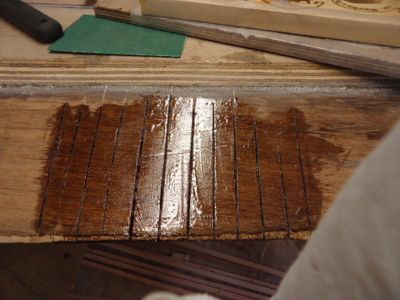
Gains-it was mystery to me before I began this build, but once doing it, it is rather straight forward. Using a straight edge and a back saw, cut a line about 10" from nil to half way through the plank.
|
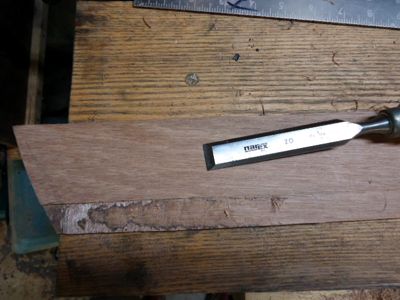
Roughly chisel along the cut and edge
|

A Stanley 78 makes easy work of cleaning up the ramp
|
Voila, in no time you have a gain. I have been using gains on each side cut half way.
|
The most time consuming aspect is the beveling. But by plank #4 even that goes fairly quickly.
|
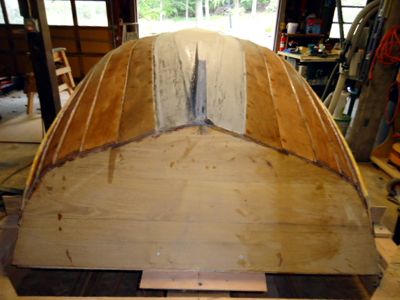
Plank # 2 glued and battened, ala John Brooks method. Bottom also clothed and epoxied, will fill and fair later.
|
|
|
Sure enough, after the bottom was put on the delamination showed itself on the bottom of the plank.
|
Since I couldn't see how to remove the planks, I got to repair my first ever planks. I cut slits down to the bad layer and
far enough on either side to find good wood, applied 2 coats of unthickened epoxy then faired with microballoons.
|
Ah, the agony of boatbuilding! After screwing, gluing and then planing the bevels, what do I discover? Some serious delamination, about 14" long. I didn't think it went deep, and couldn't bring myself to think about cutting and grinding that plank off, so I shot some CPES in the gap, then epoxied and clamped it...hoping for the best.
|
Hustling under a self imposed timeline I quickly installed the bottom (1/2" ply) and skeg (doubled 3/4" ply, tapered to 1") while thinking something about haste and waste.
|
Spring 2012 |
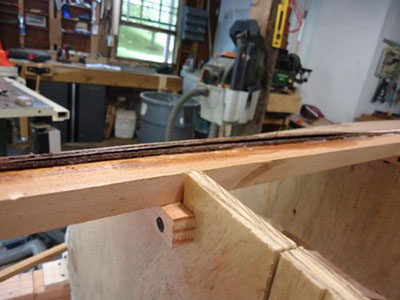
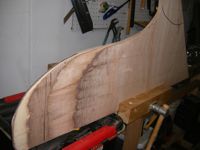
Transom hung, plank flats cut. Without knowing the plank dimensions this is somewhat of a leap of faith, or I may have just really messed up.
|
First attempt at figuring plank layout. As I can tell from this picture, I'll be tweaking this quite a bit. |
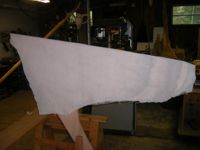
I just spiled for the first time! This is the garboard pattern. It should be no surprise that it uses more planking plywood than I had planned and will now have to order more.
|
Ah, the joys of boatbuilding! Garboards being put in place, and they fit. . Now this part is getting to be fun.
|
Winter 2011-12 |
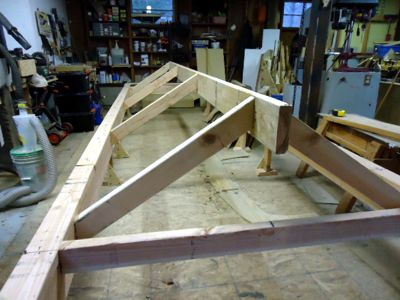 
Strongback ala John Brooks. Molds up, but not much else done this winter, boat wise |
Summer 2011
Slow progress this spring and summer, lots of other things in life going on. (Hard to believe that there could be something else other than boating!) Got some more black locust from the sawmill. Bandsawed out yet another stem, and there was, again, an oops. A very fine fault that didn't show itself until it was almost a stem. But by now I have enough parts that I splined a couple together and I'm considering the stem done (rough cut anyway.) The transom is also in rough cut form and all the molds done.
My plan is now to work on various parts of the MS this year and wait to set up the strongback until after the sailing season ends and Vika gets put to bed and surrenders the garage bay.
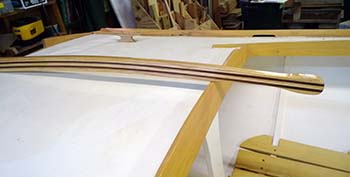
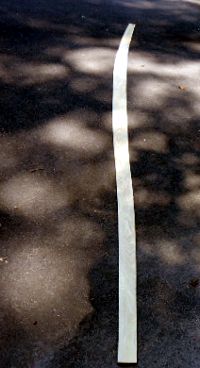
We went to the Wooden Boat Show at Mystic in June and sat in on some demonstrations. Clinton Chase made making a birdsmouth mast look easy so I gave it a try. Here's some shots of the gaff |
|
Dry fitted
|
Glued, cored and sanded
|
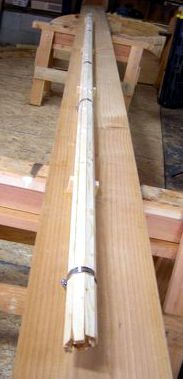
First you calculate the number and size of the staves using this handy calculator. After ripping and planing you dado a couple of 45 degree cuts. Bind them altogether with hose clamps and presto a dry fit gaff! I now need to taper, glue in halves, make plugs for the peak and throat and then glue it all back together. Clint has a website that walks you through the process. |
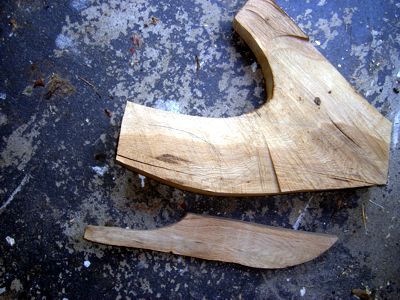
White oak crook and half jaw sliced from it. We had a large white oak fall and wreck havoc this spring. I now have lots of crooks and firewood...to last for years.
|
Dry fitted. Yes I see the knot but it is tight and shallow...it bugs me, but it's staying for now. That was the first go. Note to self and any other wood working hacks, don't waste your time finishing something until you're sure it will fit. Drilling holes for the bolts got rid of this set, bad wood the next, maybe the third will make it.
|
 |
|
 |
 |
 |
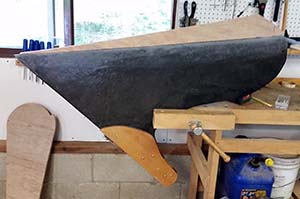
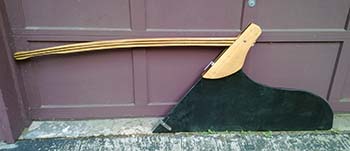
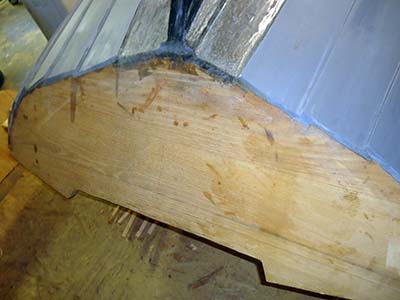
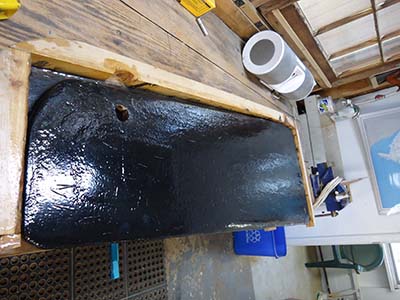
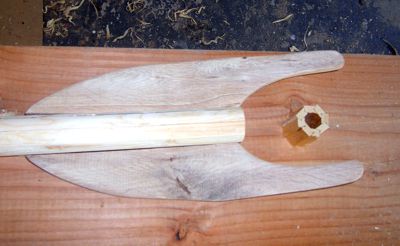
Traditional barn-door style rudder rough cut from 3/4" marine ply, cheeks are Black Locust. Thanks to Don Scott of England for pointing out that the rudder as drawn by Barto is not to scale. I remembered that after lining it out but before cutting! Next, power planed to approx. 1/4" trailing edge. Draped with Xynole-polyester cloth. Gooped with epoxy, later coats mixed with talc, micro balloons and graphite.
|
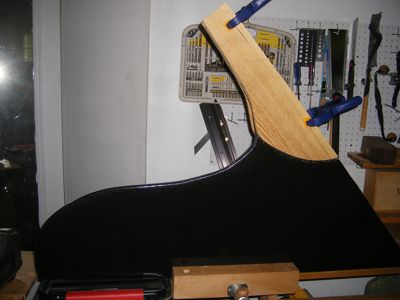
Rudder almost ready for gudgeons (and a hull to attach to)
|
Jig for notching staves
|
Brother Gary sharpening his older brother's abused tools
|
Brother Tom planing the taper to the mast staves
|
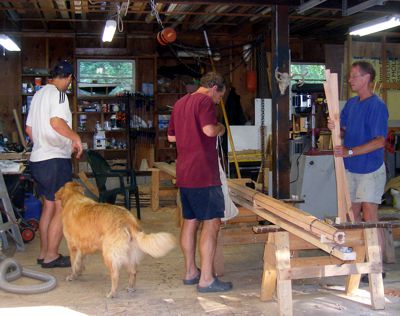
7 staves and it's the right size? Lets count them again.
|
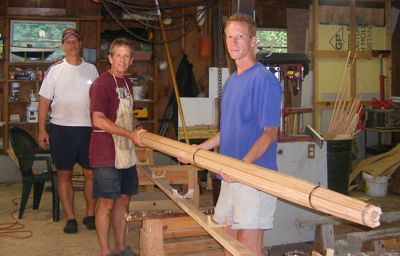
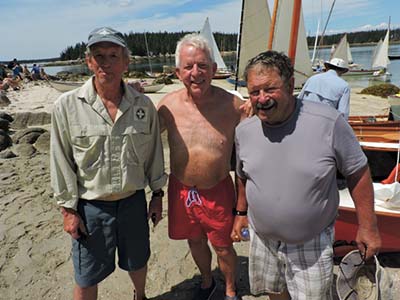
"Ugly Brothers"
with dry fitted mystery mast made to correct size with one less stave! Found some of the notches were not quite deep enough, and the hose clamps not quite wide enough. DUH!.
This project will be on hold for other projects, and sailing Vika, until time permits...hoping for a mild winter.
|
April 2011
Panels glued, stacked, waiting to be turned into planks...at some later date. Back to cutting molds. Decided to go to plan B and saw the stems out of Black Locust rather than laminate them again. Not crazy about using all the epoxy and besides I would like to leave the outer stem bright. |
| |
 Cut up a 4x4 black locust post, tried to find the best wood, double splined and glued. Cut up a 4x4 black locust post, tried to find the best wood, double splined and glued. |
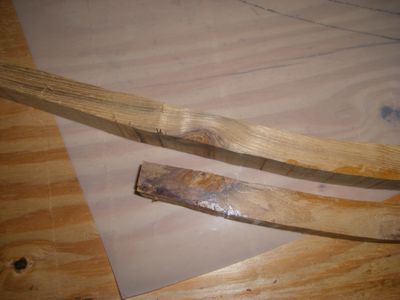 Bandsawed the inner and outer stems apart and discovered one nasty knot
. |
March 2011
One cold month, many days not seeing 40, so not a lot of progress. |
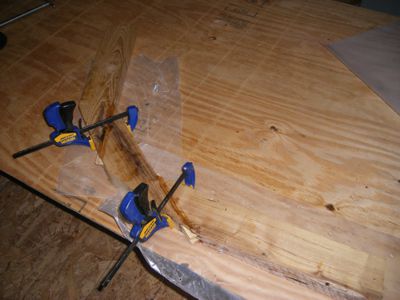
On a rare day that did get above 40, quickly glued and clamped the scarfs.
|
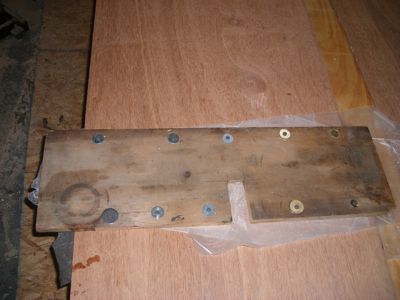
Also splined, glued and rough cut the transom out of Black Locust. Now to figure out how to cut the flats for the planks. Without knowing the plank widths at this point, it is a head scratcher.
|
-Start of the full size MS
Next, build the real thing. On Valentines Day a stack of marine plywood arrived from Boulters: 1/4" Merranti for the planking, 1/2" for the keel and CB cheeks, kingplanks, 3/4" for CB, skeg, 5mm Okoume for decking. I have some black locust and Douglas fir in the shop. Now I have to build it. All I need is Spring!
Molds, stem and transom patterns were traced unto sheets of mylar then transferred to 1/2 ply. Let the build begin! |

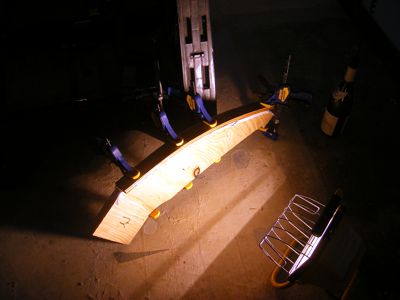
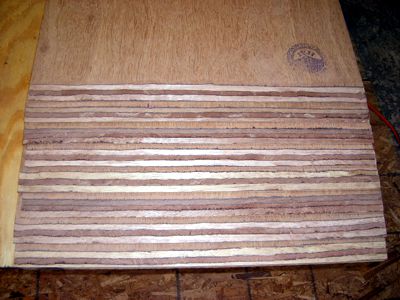
Finally the shop got to 40 and I got to make some sawdust. Got the mold for the stem bandsawed and 16 3/16" veneers of black locust cut and soaked them overnight. Here they are drying over the mold. Can't say I'm looking forward to the next step, gooping this with epoxy.
|
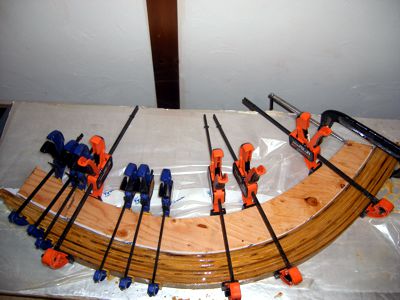
Glued up using West System Epoxy and a little silica thickener. Did this in the basement where it was warm enough to work. Barto says to glue the inner and outer stem at one time then bandsaw them apart. Like Barry Long and others I taped the veneers between the inner and outer and that should save some cutting later.
|
|
 Disaster! A rather inauspicious start to the project. While cleaning the stem I noticed a little delamination, then when bandsawing to final shape, total delamination! Arrghh! Several days work shot. But better now than on the boat. Possibly clogged pump resulting in bad ratio, epoxy not up to temp, too much clamping pressure...all of the above? Got advice from the WB Forum. Disaster! A rather inauspicious start to the project. While cleaning the stem I noticed a little delamination, then when bandsawing to final shape, total delamination! Arrghh! Several days work shot. But better now than on the boat. Possibly clogged pump resulting in bad ratio, epoxy not up to temp, too much clamping pressure...all of the above? Got advice from the WB Forum.
|
After washing the hardener pump, subsequent laminations came out fine. But now my thought process comes in to play, or not. While using the mold as a template on this frame worked OK, I soon found out that the mold didn't allow for springback on the more curved molds, which are most of them. So it looks like I'll be building a steam box and using that for the majority of the frames.
|
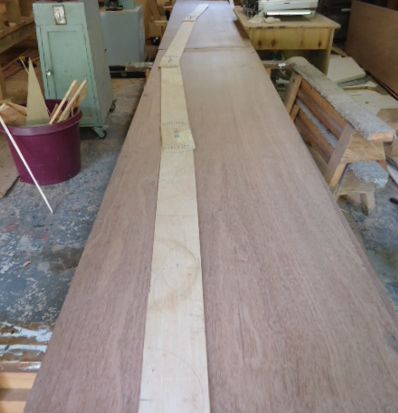
1/4" Merranti just about ready for scarfing. Unfortunately since the boat is 16' long I'll need to add another section for the upper planks.
|