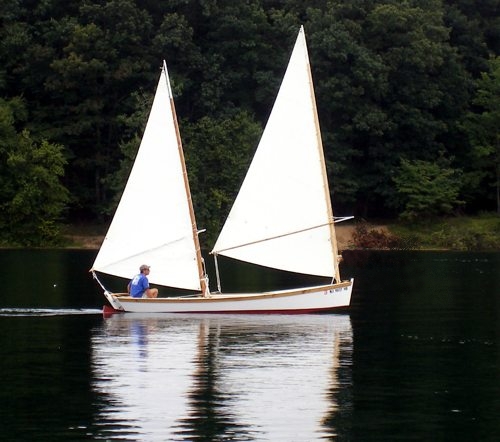
"This particular boat is also very simple to build, and represents an excellent model for the beginner. " Reuel Parker
|
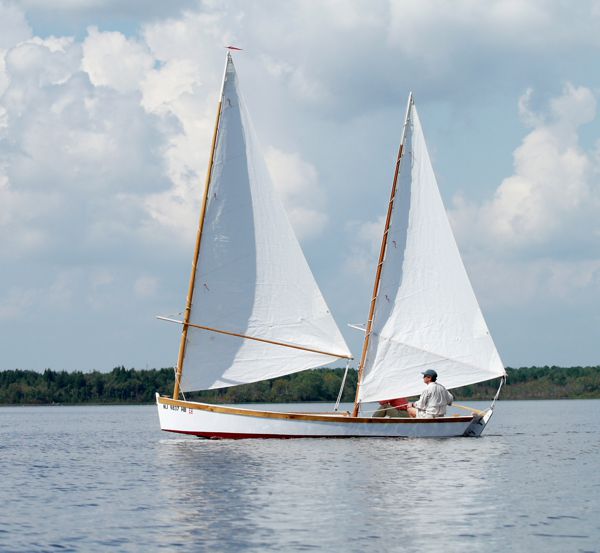
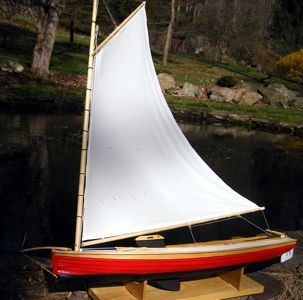
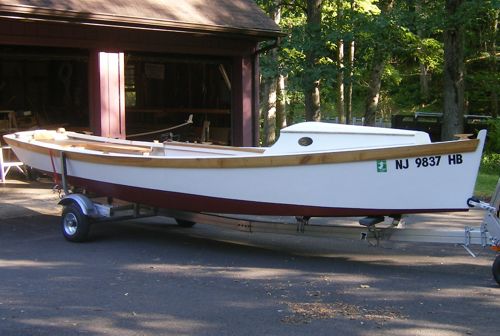
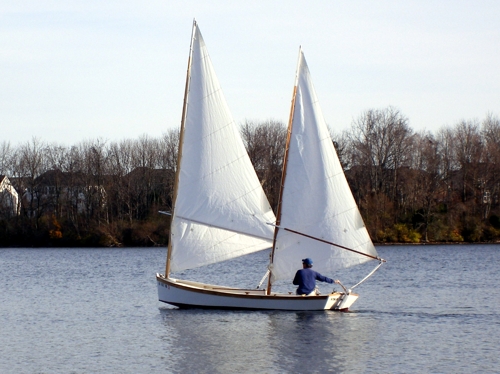
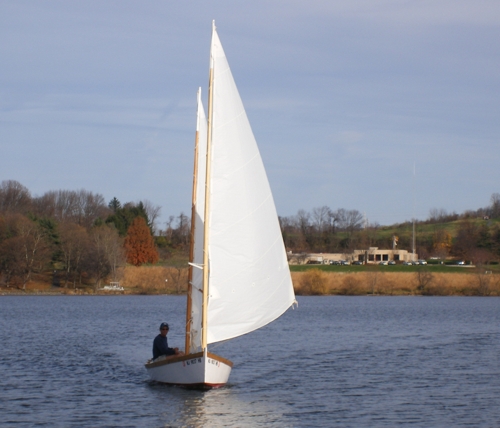
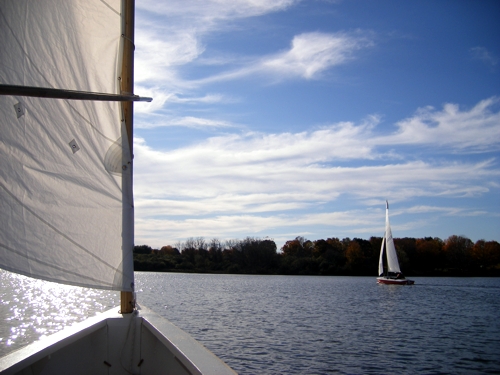
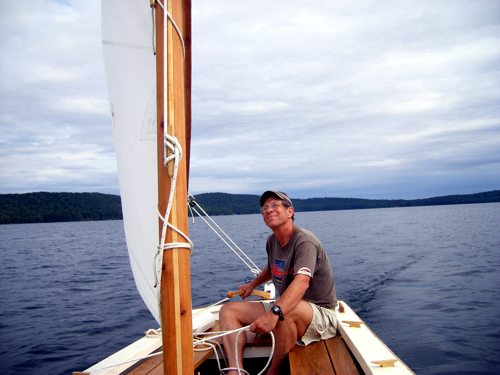
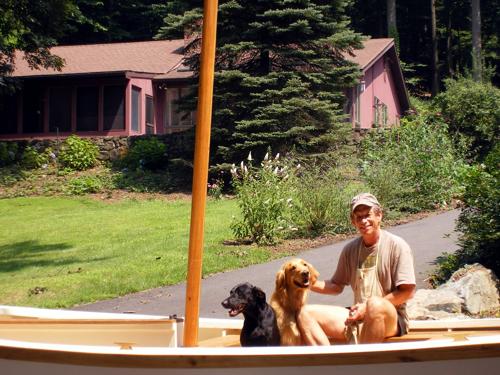
Photo: Andrew Slavinskas

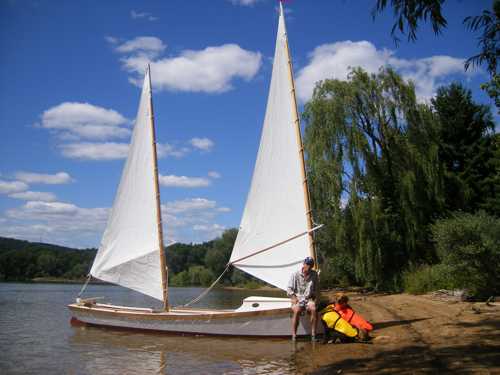
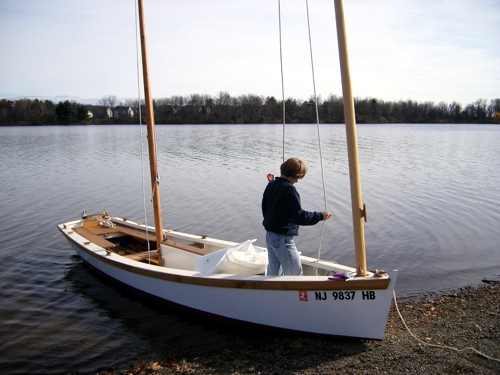
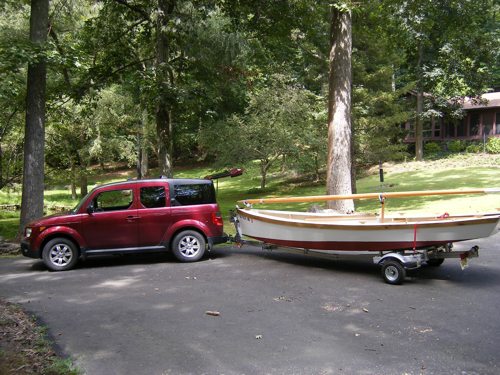
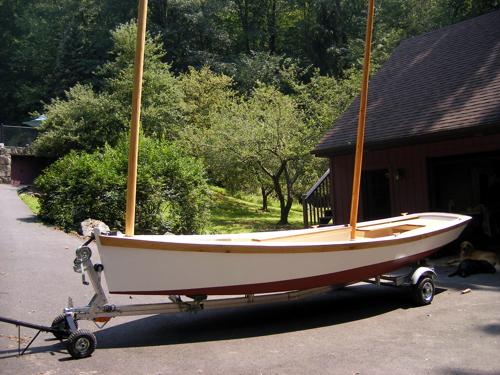
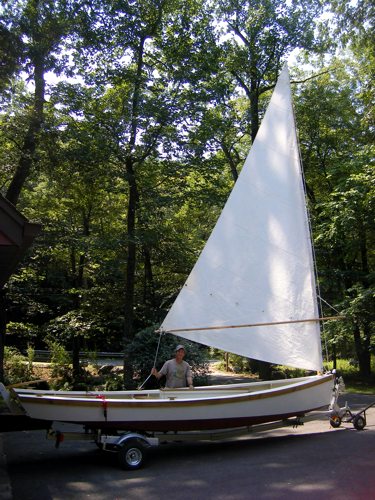
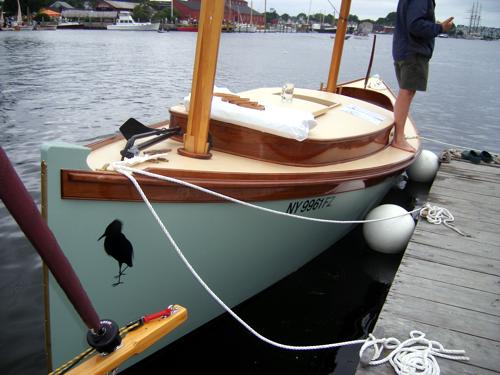
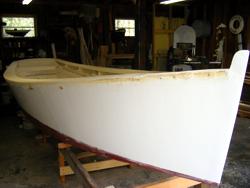
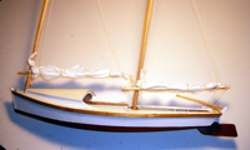
The sharpie design is believed to have originated along the Long Island Sound in the 1800's as a workboat in the oyster fishery. Sharpies are long, narrow sailboats with flat bottoms, extremely shallow draft, centerboards and straight, flaring sides. They are noted for being relatively easy to build, very fast, stable and had the ability to carry a lot of cargo. This particular design is a half scale model of a workboat used in the Great Lakes.

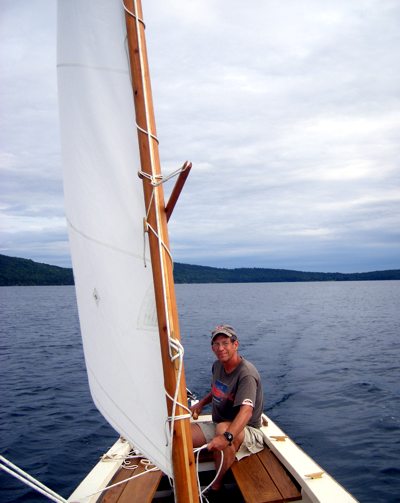
VIKA - A Scottish girl's name meaning "from the creek." Since my workshop is just feet away from Rockaway Creek and we recently vacationed in Scotland, the name seems appropriate. (and it only has 4 easy to paint letters!)

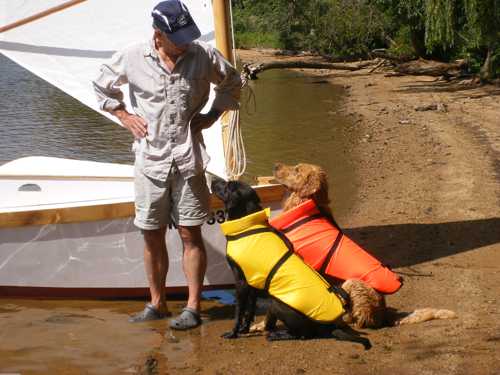
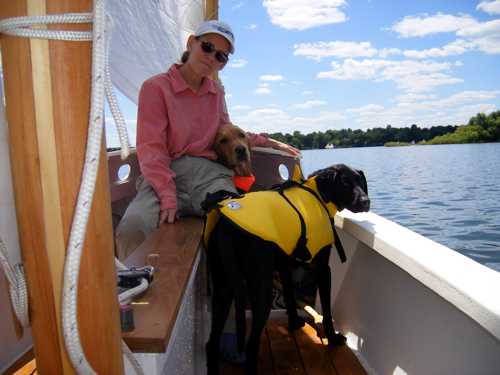
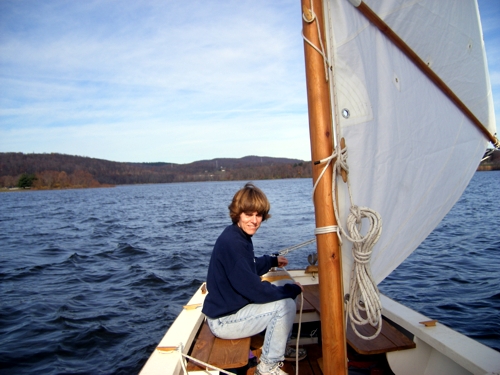
The Crew: Steve Brookman: Novice Boatbuilder, Wife: Susan: Novice Sailmaker, Dogs: Schooner and Dory, loyal companions and consultants.

Background: I've been sailing most of my life, even spent several years as a live aboard. When we moved to NJ in 2006, we moved to a beautiful part in the hilly western part, a good drive from the "shore" as the ocean is called in NJ. There are 2 reservoirs and several lakes nearby. That and the current economic situation made small boats a nice option. I had never really thought seriously about building one, but I caught the building bug after reading about sharpies in Wooden Boat Magazine and Reuel Parker's Sharpie Book.

Not having a great amount of woodworking skill or knowledge, or even tools for that matter, it has been, and is, a learning experience. I can appreciate the value of apprenticeship, shop class, trade schools, at virtually every step of the building process, as I stare, scratch, flip through one of the many reference books, or search the web, trying to figure out what is the next step and how best to do it.

That being said, I must confess to now being a boat building addict. While this sharpie is just out of the shop I've already ordered plans for a next boat(s). Now with some better tools and a little experience I can envision how the next one will come out, and the next....

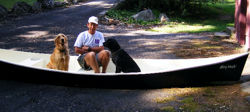
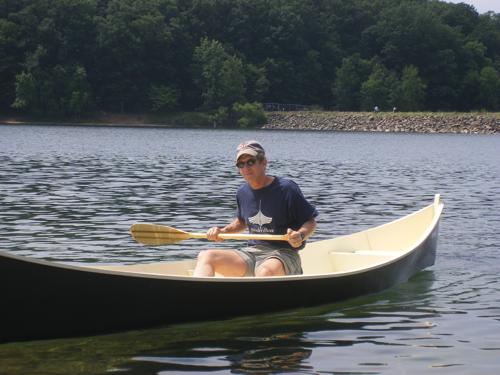
Summer 2007: Peace Canoe-Before there was a Sharpie project I built the Peace Canoe as a warm up. I finished it in the fall of 2007, and finally launched it June 2009.

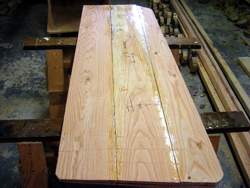
Wood-Finding wood for this project took many phone calls, internet searches, and visits to lumber yards. I eventually stumbled upon a small sawmill (Middle Valley Lumber) in Califon, NJ just 6 miles from our house! It has a wide assortment of local woods, some suitable for boat building, including white oak, ash and black locust. I did find Douglas Fir in the local lumberyards.

Frames, floors, keelson: white oak
Bottom: 1/2" marine ply, sides: 3/8" marine ply, deck: 1/4" marine ply
Stem, apron, CB posts, thwarts, wale/sheerstrake, cleats : black locust
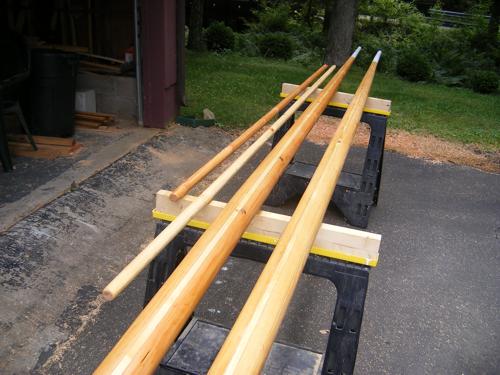
Masts, logs, CB, rudder: douglas fir (CB & rudder sheathed in 1/4" ply) masts have 1" spruce laminated between 2" DF
Tiller: ash Sculling oar: ash and spruce

Building of an Ohio Sharpie - Summary of building Vika


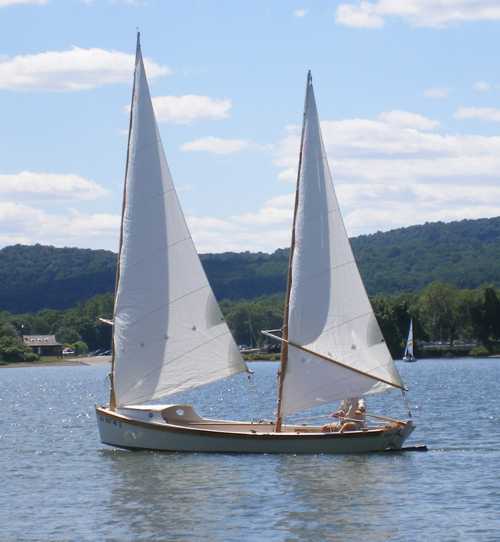
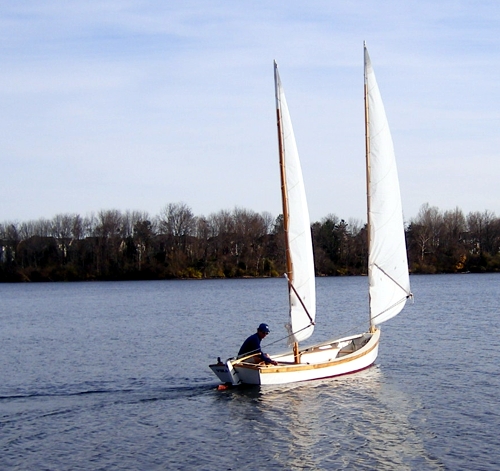
The 19' Ohio Sharpie as drawn by Reuel Parker

Sharpie Progress

2010
Summer
Spring
Winter
2009

November
October

September
August
July
June
May

April
March
January-February
2008

December
November
October
September
August
July

Peace Canoe

Comments, suggestions, questions?
Thinking of building your own Sharpie or have a suggestion on how it should really be done, let me know.

Modeling, Not Just for Kids
by Me (Steve Brookman)
An article in the April 2010 Mainsheet, Newsletter of the Delaware River Chapter of the Traditional Small Craft Association

For more information on the
Delaware River Tuckups
visit: Tuckups.com

Two many boats, our driveway got full so VIKA is now SOLD. She left behind another Honda Element so she should be in good hands.


We're sad to post that a great crewmember passed away at too young an age. Dory was only 7 went she went on a pre dinner romp up the hill behind our house, layed down and didn't get up. She went peacefully. Unfortunately we were away at the Mid Atlantic Small Craft Festival and didn't get to say good bye. She is missed greatly.


Summer 2010
Decided to add a "doghouse" for the dogs and to store gear. Didn't think the dogs would like the heeling and tacking without a secure place to go. So I built this removable cuddy. I found Fred Bingham's Practical Yacht Joinery very helpful with this project. The sides are 3/8" ply, top is 3 layers of 1/8", sill and posts DF. It has one laminated frame on the aft end for stiffness. The house came out ok, but the dogs seem ambivalent about it, but not about being on the boat or in the water.

Spring 2010 "Re-Do's"
We've been able to sail Vika several times this spring, relearning some from last fall. Had one sail where we tucked a reef in the main. I estimate that the winds were gusting over 15 with whitecaps blowing off the top of the chop. We beached her to reef which made the task easier and she handled nicely that way. Still learning the in and outs of sharpie sailing. I've managed to put her irons even with a breeze blowing on several occasions...need to work on that. Some notes to self and other builders; don't forget the stopper knot on the CB lanyard, even if it's plenty long...you don't have to ask why I know that. Also leave the snotter line long enough to work with reef(s) tucked in.

Finally we get a break in the weather and it is such a pleasure to get out the power plane and start throwing some sawdust around. Before Spring officially arrived I managed to plane the trailing edge of the rudder to half it's former width, reclothed, epoxied, faired and painted it. Should hopefully have less turbulence now. Dropped the CB, "debunged" the CB truck top and pried that off so I could check out where the water was seeping in from. It was a small crack on the stbd side which I will grind down and recloth and epoxy. (not fun) While the CB was out I coated it with graphite and epoxy. It would stick occasionally so I will also drill a hole in the trunk top for a stick to convince it to come down if needed. Also added a bronze rubbing strip to the CB and two beaching strakes w/bronze strips under the bow.

Winter 09-10
A cold and snowy one here in NJ, and with an unheated shop, nothing is getting done on Vika. Waiting on spring, c'mon spring! Once we get a break there is a list of projects: dropping the CB, find and fix the weeping, upgrade lanyard, refair while we're at it, heck repaint it w/graphite. Also fair the trailing edge of the rudder, put both masts on a diet by planing them, and then refair and repaint the hull. Should be able to get that done before summer??

One good thing about northern winters is you don't feel guilty about doing indoor projects. So I made a little boat bookcase and then a 2" scale model of a Delaware River Tuckup which I had planned on doing full scale. (Having since sailed in a Tuckup, my wife, being ever practical, asked where would I get the crew to keep her upright? So I ordered plans for a 16' Melonseed.)


November 2009
We snuck another sail in after checking the weather forecast just before putting Vika to bed for the season. It was our best day sailing so far. Mid 60's and a nice 5-10 northerly breeze. We had the Spruce Run Reservoir to ourselves. We left the ballast on shore and got the rail down a few times. Very nice!

All the leaves are down and we're going sailing, gotta love it!

It's nice having a wife that helps rig.

So she earns time at the helm.

Sailing into a November sun with the temps in the 60's! We were used to that in Florida but not NJ.

Dropped Susan off to get a few shots of Vika sailing.


Made a somewhat crude 13' Bahamian oar, complete with leather, and sculling oarlock. While it was a good drill I haven't got it to work too well. I lost ground today to the light breeze. At least I know I can make an oar and leather. And Vika paddles well enough without needing to scull.

October 2009
A few days of beautiful Indian Summer and we were able to get in a few more sails. These shots were taken at Spruce Run Reservoir (Clinton, NJ)

Susan likes to take pictures of her sails, and rightfully so.

Ghosting in light airs again, but then we'd get some brisk breezes to make it interesting.
 
I mounted a sculling oarlock on the transom and made a Bahamian style sculling oar. Jury is still out as to whether it was worth the effort.

September 2009

Summer is drawing to a close, but we're sailing! Review of the 1st few sails: she's extremely stable, I can stand on side decks! But there is not much room for error once the breeze picks up...not much freeboard when sailing on her chine to getting the lee rail down (and buried.) The helm is well balanced, but you really notice the leeway while tacking back to the boat ramp, into the wind, of course. Lacing 2 sails in any type of breeze and getting the sprits snottered (is that a verb?) takes some time and while we're getting smoother, still not up to snuff. Leaving the sails laced on could be a good option after the masts get a bit lighter. Stepping and unstepping is much easier from a dock than on land.


Very important when planning your boat is to match the colors with your tow vehicle. Who'd thought Hondas would come in porch red?


Mast Transport System. I thought I was real clever, but we'll discuss that later.

Very light air in this shot. The helm has been well balanced so far, but haven't given it a real challenge yet.

Susan gets the helm, after all she made the sails.

And nice sails they are!

Yep, she did a fine job!

August 2009
VIKA sees the sun! Rollout on my birthday seemed appropriate. Still lots of stuff to be done, but I can almost smell the water from here. VIKA passed inspection with NJ State Police, which only proved that it was obvious that I built, and didn't steal, her. Got through the DMV: title, registration, HIN, and now she's legit. Even got her wet, a trial sail on 8/27. She didn't leak, sailed with a balanced helm, so I couldn't be happier. Ok I would be if I made lighter spars and it didn't take so long to rig. We did find it much easier to step the masts from a dock.

Susan smiling while sewing sharpie sails on a sultry Sunday in her sail/stained glass loft.

Main Sail just about done.

Susan with her first sail! And she's still smiling!

Sprit boom rigged. One more sail to go.

Snotter, Pete Culler style.


Fully rigged...almost...now just add water.


Launched and she didn't sink! Not the official launch, just a quick launch to see if she floats. And that she does, and sails mighty fine too, at least in light breezes.


July 2009

One year into this project and I hope to get some good work done on the boat this month as we're into the summer months and I really would like to get her on the water before it ices up again. The sails are ordered, and my wife has volunteered to sew the precut panels.

Made up some boat oil, and oiled the spars

Near tragedy! That pile of ashes was a 30 gallon trash can that I put the rag that I had used to wipe down the spars with. I discovered this a couple of days later, and it was obviously just DUMB luck that whole shop didn't burn down. Never, NEVER, throw even 1 rag into the trash.

Installed floorboards, even though the plans didn't call for them. How could a boat be called sharp without them?

And it was so much fun resawing, cutting and screwing...how many boards? But they do finish off the interior, plus provide a space to stow lead ballast and hide the butt blocks to boot.

June 2009

It's time to finally get to the masts. I've been holding out on this project mainly because I didn't know what it involved exactly. After spending several hours at the local lumber yard I finally settled on a few lengths of 2" DF, 8 and 10" by 22-24' that I thought I could get the masts out of. Of course 2 2" boards only yields 3" and I needed 3 3/8, so I planed and fitted a piece of spruce to make do.


Reuel Parker says he can knock off several of these in an afternoon. It took me all day to cut, plane and rough sand it into a close proximate of a mast. I guess that's why he builds boats for a living and I don't. I have to admit that during this process that I considered the merits of a sloop over a ketch rig.

If this was a sloop, we'd be sailing now...well almost.

Interrupted the Sharpie to buy and assemble a trailer and to finally launch the Peace Canoe that I built 2 summers ago.

Ok, it floats, now back to the Sharpie.

Drove to Mystic for the Wooden Boat Show, where we got to see lots of great boats, including some sharpies. Some new....

Some not so...


May 2009
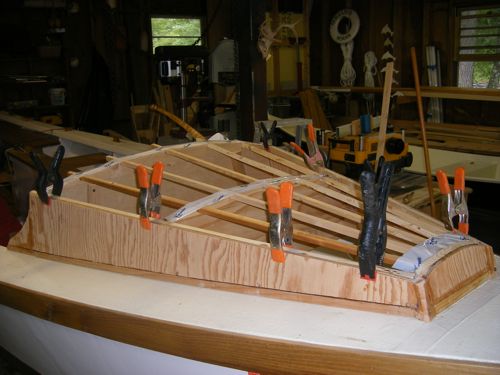
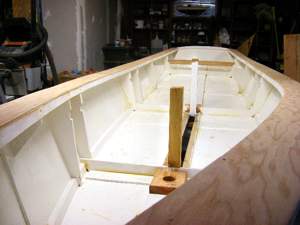
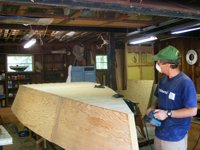
Starting to put the pieces together. This is exciting and a bit unnerving as there is a level of permanence now. Parts will be screwed, bolted, bunged and visible! I'm keeping my fingers crossed that everything fits, works, and maybe even floats. Sailing is still months away, but I'm already scratching my head about the rigging.

Sheerstrakes/wales added. Resawed and scarfed my remaining black locust plank. The resawing was just about the limit of my woodworking ability, the scarfs came out ok. The actual wrestling and fitting them in place was not as difficult as I had imagined, but one side did complain more than the other.

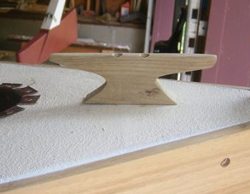
Cleats out of Black Locust seemed to fit the boat.

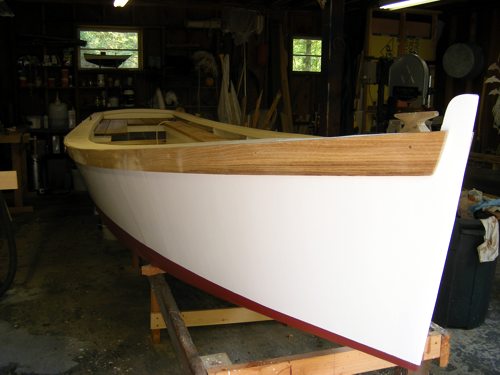
While the hull is no where near as fair as I'd like, I'm finally accepting it and moving on. This is my first real build and have I've left lots of room for improvement for next one.

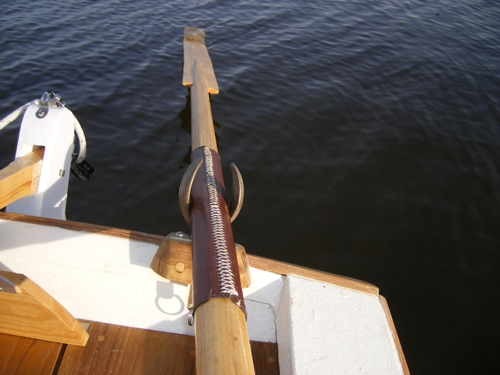
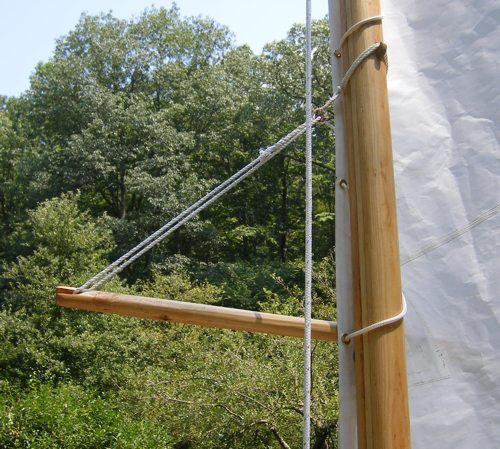
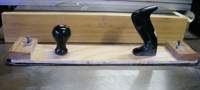
I hadn't used that leather briefcase in years. I'm hoping I'll get better use out of it as mast (and soon to be, oar) leathers.

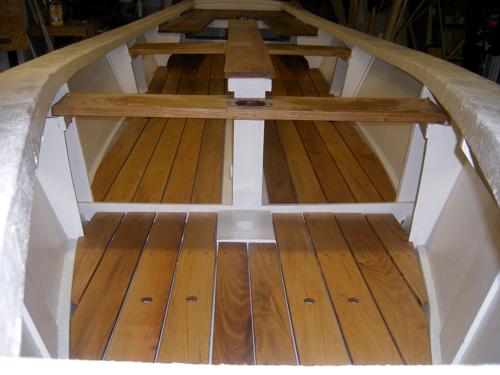
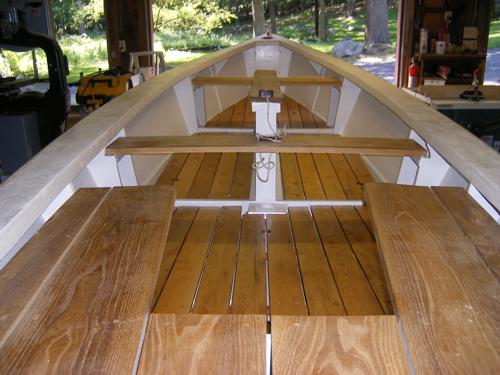
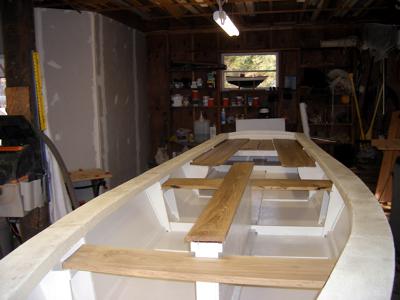
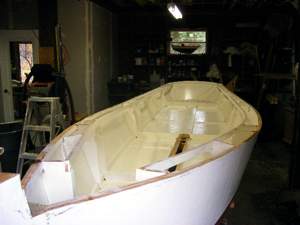
Last view of the interior before the thwarts and stern sheets get put on. At least 3 coats of Interlux over epoxy on all surfaces. There will not be any permanently sealed areas, although getting to the niches in the stern will be a challenge. Rigid foam glued under the deck and in forepeak.

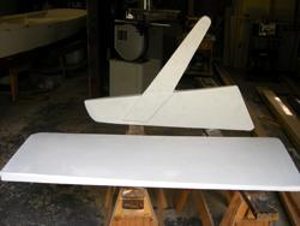
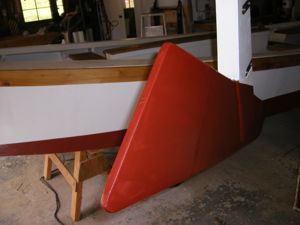
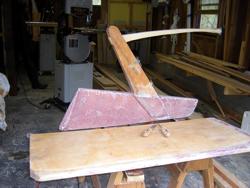
Rudder and CB primed with 2 part epoxy paint. Final paint next and then the fun begins: getting the board fitted in the trunk. Wrestling this CB around makes one think about how large the next boat should be!
(Mouse over to see almost finished rudder)

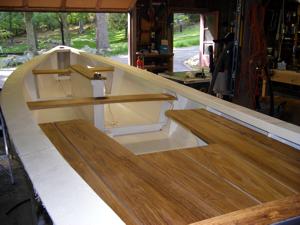
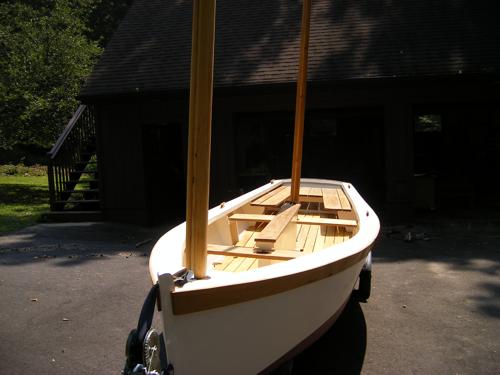
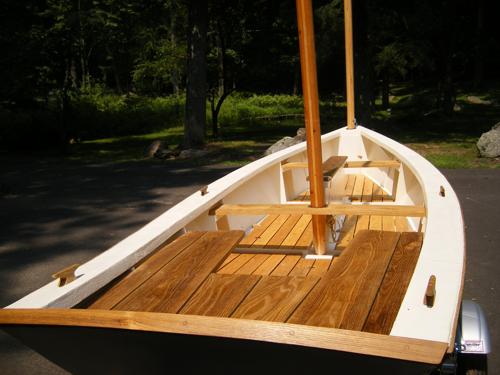
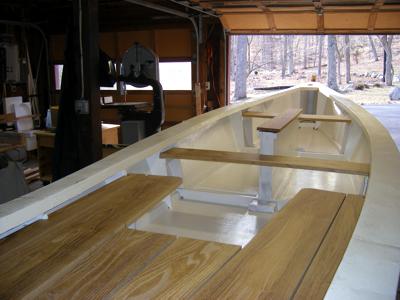
Putting the pieces together, hopefully not prematurely. Stern sheets, screwed, bunged and tung oiled.

Centerboard installed, only had to take it out and recut/refit it a couple of times. I rigged a double purchase and a cam cleat to get the thing back up. I made up a batch of tallow, ala Pete Culler, to grease it (and had to train the dogs not to lick it!)

April 2009
Spring has sprung and we're getting some stuff done.


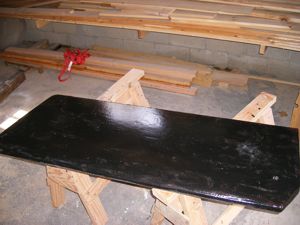
The centerboard was faired, and fitted with 32# of lead. I was just about to melt and pour when I realized that the lead ingots were very close to the thickness of the board so I opted to trim them and epoxy them in place.

The board was then covered with 1/4" ply and dry fitted into the CB slot. Good idea there as the slot has shrunk some! Trimmed about 3/4" off the length of the board.

Faired the edges, sealed it with cloth and several coats of epoxy (doubling + the bottom and forward edge.)

Rudder planed, covered with 1/4" ply, xynole cloth and epoxied.
Tiller carved and pintle straps chiseled.

Laminated some black locust to make a cap for the top of the transom.

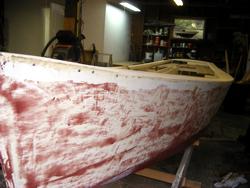
Wasn't happy with the hull, so gave it the pox, with another coat of thickened epoxy. Should have done that before flipping her over.
March 2009
Finally some progress. Got the decks clothed, epoxied and painted. Centerboard trunk installed and black locust thwarts cut, planed and dry fitted. Now I can really get a feel for what she'll look like.

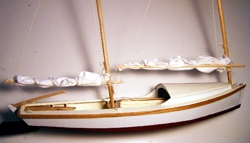
January-February 2009
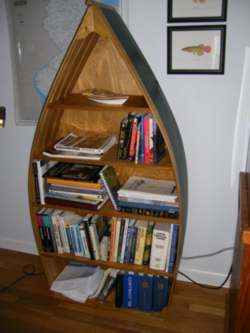
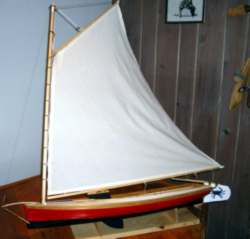
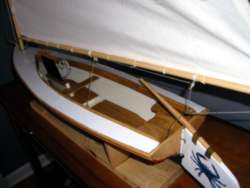
One cold winter here in NJ! Since not much is getting done on the real boat, I decided to remake the model of it and see how a "dog-house" would look. Also changed the paint scheme and used black locust for thwarts and trim as I plan to do on the real thing, one of these days.
December 2008
Not much progress on the boat, not only was it cold, even for December, I had to make 88 awards for a trail run in January that I direct
. I did get the CB halves put on. Hoping to make some good progress in 2009. While I can dream of sailing it's too soon to know if it will happen this year.
November 2008

Decks, CB posts and mast steps in. Making a mess but starting to get a feel for what she'll look like.

CB trunk halves, clothed, epoxied and painted with Tile Clad

Used the grips from a broken plane to make this long board sander. Wish I had made this earlier.

Interior epoxied, 2 coats of paint, side frames and deck carlins added.

Still carving centerboard.

October 2008

Bottom painted, not w/real bottom paint since she won't live on a mooring. Next, get a crew to flip her.


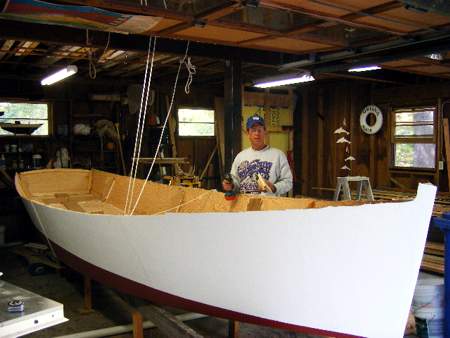
Flipped! No crew so rigged a block & tackle and recruited wife, again.

September 2008
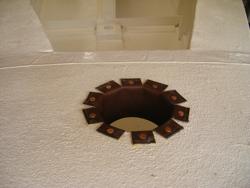
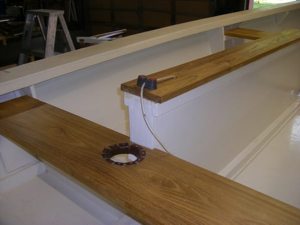
Plumbed the loft, and my workshop. Used up the extra sheet rock that had been occupying valuable shop floor space and made a small office in a back corner. As long as I was tearing and building stuff, I used some white oak to fashion a more usable workbench. Now onto the fun stuff. Susan's Dad showed up and we cut the centerboard slot, did some fairing, applied one layer of xynole polyester cloth and 3 coats of epoxy.

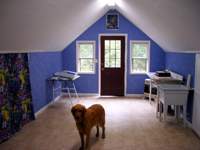
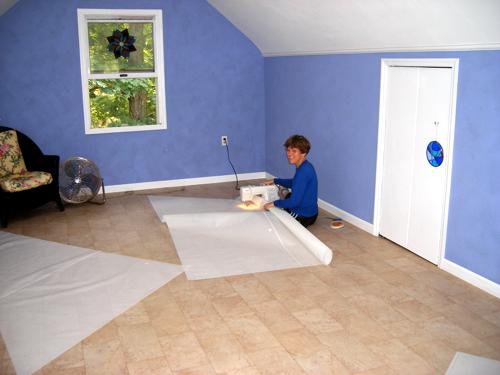
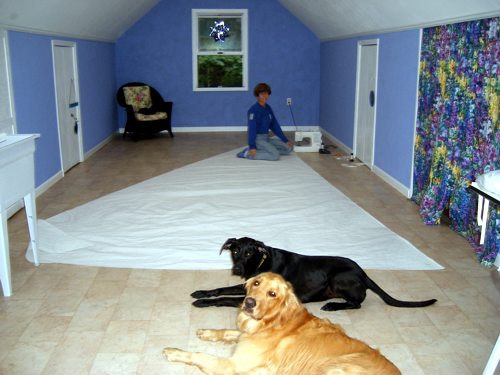
Susan's glass studio, above the boat shop.
(mouse over shows a before shot)

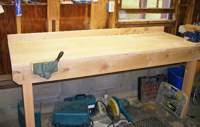
A quick workbench, and a old vise from a yard sale.

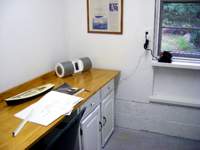
Small office area in back of shop.


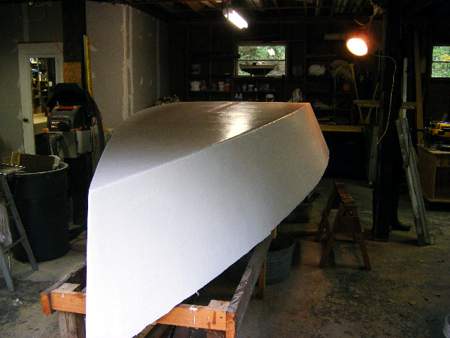
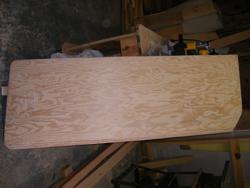
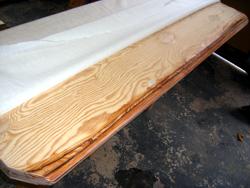
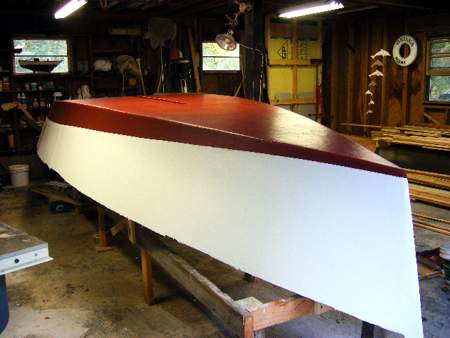
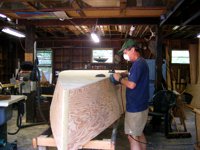
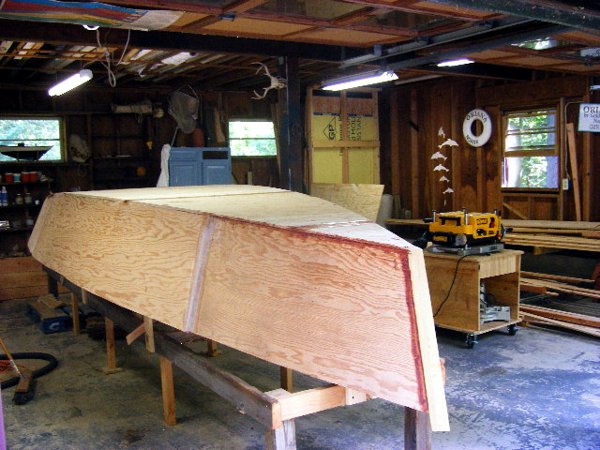
Moby Boat! Epoxied, primed and about ready to be flipped.

August 2008
Redid frames in white oak, rough cut side panels. Bought Planer, made a stand for it. Planed and scarfed oak for keelson. Planking glued and trimmed. Bottom and stem attached and trimmed.

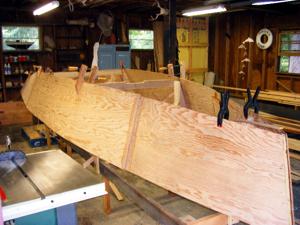
Planked, well, clamped anyway. Reuel has you glue the side panels to the stem and then mount this big "V" of plywood on the frames. Not a solo operation, thankfully I have a strong wife.

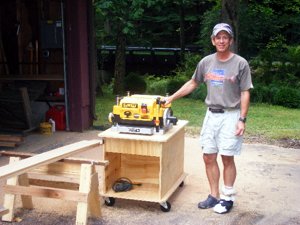
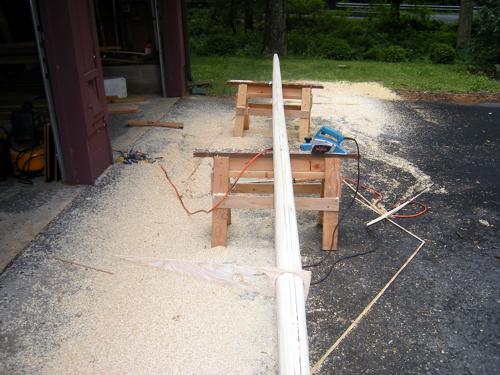
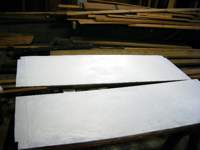
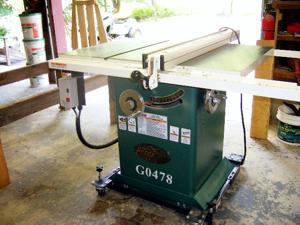
Necessary side track: you get rough sawn lumber you need a planer. Since it was a bench planer I had to build a base for it. The soft cast is for an Achilles issue. Amazing how much more time you have for stuff when you're not running 50 miles per week.

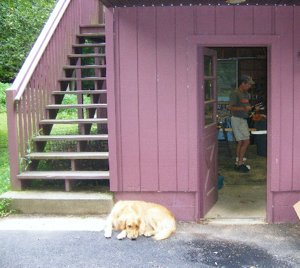
No matter how long I work or how boring it gets, loyal Dory guards the shop.

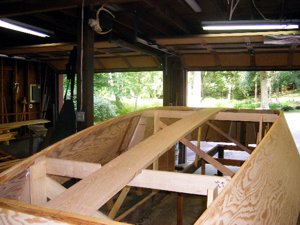
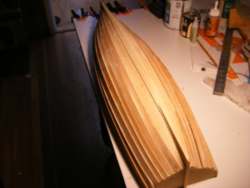
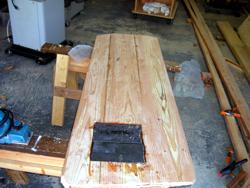
Planking trimmed, chine logs and keelson attached, bottoms up next!

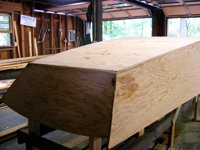
Bottom's up and on, with some 5200, epoxy and bronze ring nails. Stem attached also. Next up, ease the bottom edge, cut slot for CB, then apply cloth and 3 coats of epoxy. But before that there is a loft that needs plumbing. And since I'm tearing into things, seems as good a time as any to organize this workshop, enclose an office area and build a real workbench. Don't think the boat will go anywhere in the meantime.

July 2008
The strongback was actually built with help from my father-in-law when he visited last fall and was anxious to get this project started. I picked up some DF 2x6's in the fall also, and they waited until now to be put to use.
The addition of a real table saw, vs the contractors saw I had been using for 20 years, will give me fewer excuses for sloppy work.

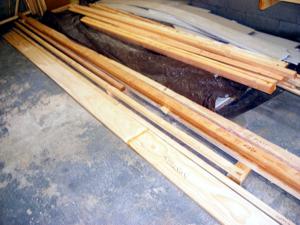
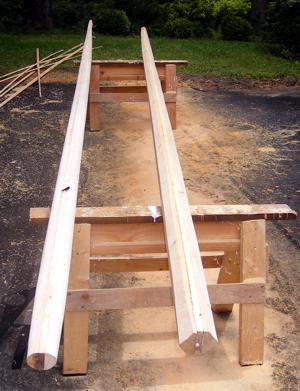
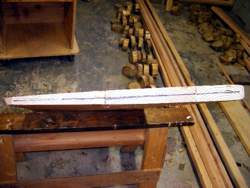
Masts, logs, keelson, some ripped, some scarfed

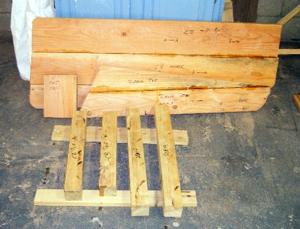
Rudder and Centerboard (DF) in the rough, CB posts, stem and apron (Black Locust)

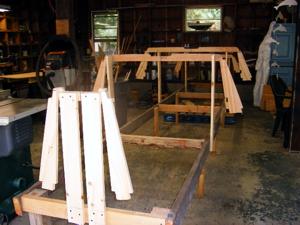
Strongback w/frames, we're finally building a boat! I would soon discover that the frames needed more bracing and that white oak would be more suitable than the select pine that I started with.